April 2,
I'm very excited about finishing the deck house. Once it is finished, all the framing for the boat will be complete. Decking won't go on until near the end of the construction because I want all that access afforded by leaving the deck off (and the deck house roof). I'm waiting on delivery of the high density polyethylene (HDPE) welding rod but once the laminated beams are complete, I will remove that jig on the table and have room to start cutting HDPE. Until the tanks are in, I'll leave the main deck house roof unglued to make it easier to drop the tanks in. After the tanks and plumbing, we will continue cabinetry work.
I took a week off work to get a few things done around the house and work on some of my favorite projects... yep the boat is on the top of the list.
 |
| Fabricating the main hatch. |
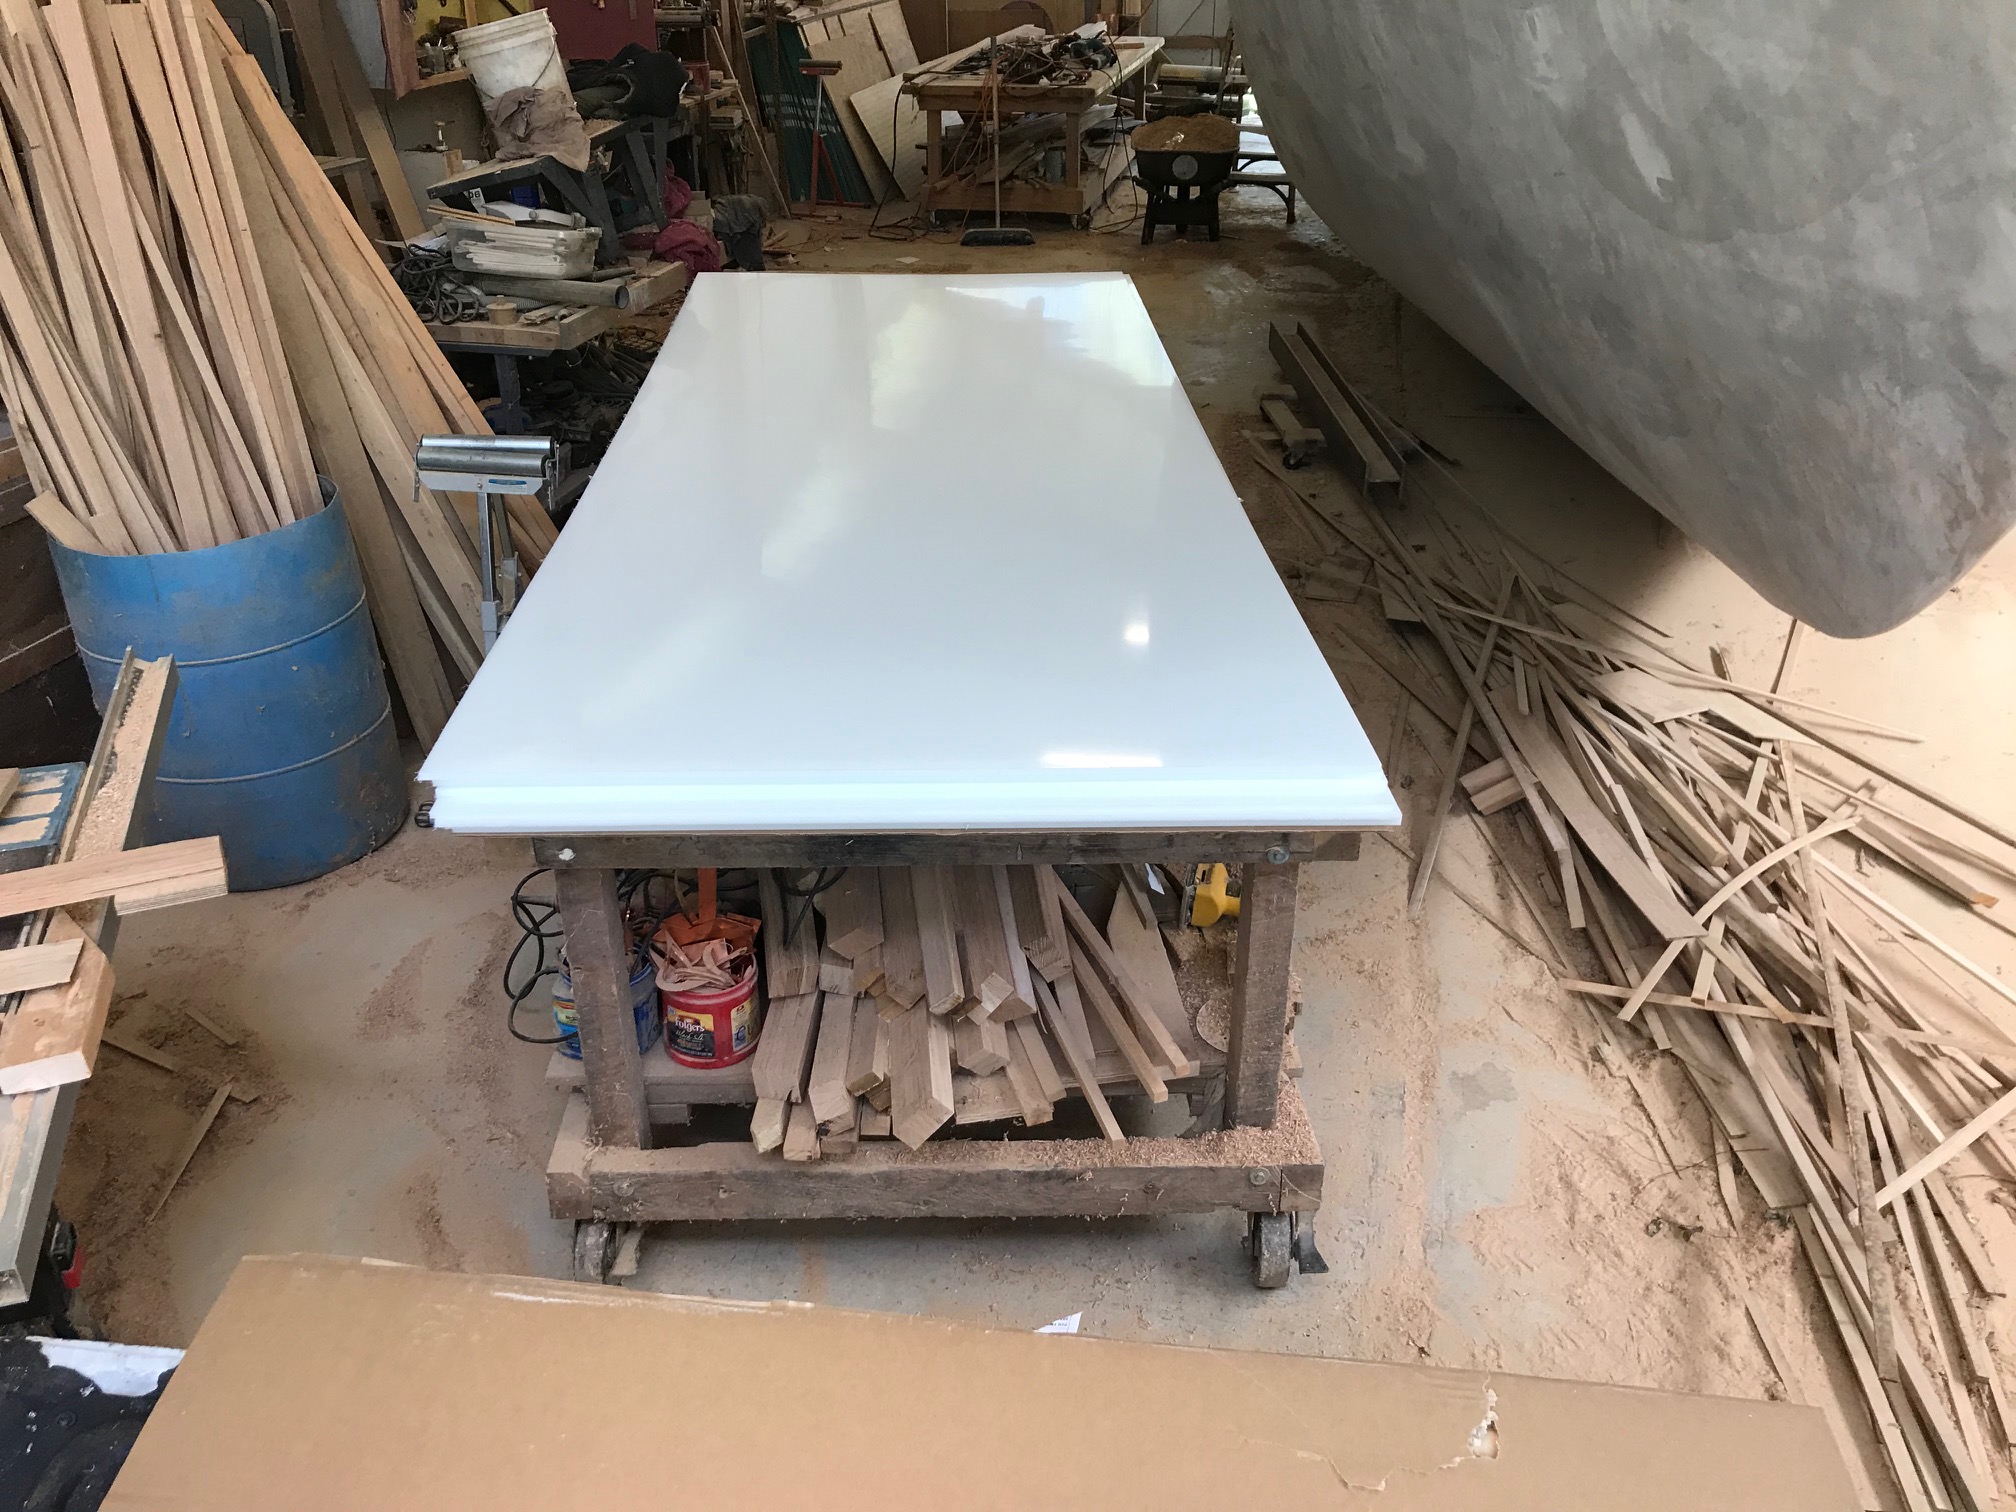
I finally was able to purchase the 3/8" HDPE sheets to build the black water and fresh water tanks. There will be 4 tanks, 2 each for black water and 2 each for fresh water. A total of around 200 gallons of fresh water and a bit less for black water.
 |
| I have my 3/8" (9.5mm) high density polyethylene sheets (HDPE). There are eight 4 x 10 feet (1.2 x 3 m). Plenty of material for ~200 gallons of fresh and ~200 gallons of black water tanks. I also have my welding tips for the Leister hot are welder but the welding rods are on back order. |
 |
| Welding tips for the hot air welder. The one in the middle feeds triangular welding rod into a corner. |
April, 4
 |
| I've got the main entry temporarily screwed together. I added a taper to the entrance so our slats can only go in one way. No confusion and these pieces protect the end grain of the plywood. One of the biggest issues with plywood construction is unprotected end grain. We are ready to take all this apart and add glue and real fasteners. I'll probably hold off until I get the tanks built and installed. I figured it would be easier to get them in the boat without all those beams in the way. I still have 4 of those beams to fit. I can glue up one beam a day now that I have all the wood cut and scarfed together. |
April 11,
I cleaned up the shop a made some jigs to try my hand at welding the tanks. There was a bit of a learning curve but it is not as difficult as welding metal. It is much more forgiving. You can stop for a second and start back without broadening the weld pool. Well there really never is a weld pool. It's more of like hot glue. There is a fatigue factor with feeding the welding rod into the tip. Don't rush the weld. Just let the pressure of feeding the welding rod move the tip along the work while holding the tip a few millimeters off the work and using the "hat" on the tip to press the welding rod into the work. The welding rod will become clear on the outside with a core that remains white. This is the perfect temperature for laying a bead.
 |
| This is one of my first practice welds. I weld both the outside and the inside. |
 |
| I bevel one piece so there is a grove where I fill with weld on the outside. |
 |
| I use the router to make a quick bevel. It works amazingly well. |
 |
| Watch the corners. Here you can see that the corner is popped out a little. It's not a real problem but I want to avoid it as much as possible. In the future, I'll make sure the pieces are all well supported. |
 |
| I made a jig to hold the tank pieces in place when they are being welded. Here I'm fitting the last side before welding. Even with the jig, the sides tended to contract and bend toward the weld. You can see the sides bending in in the middle. I still have to weld the outside. I'm hoping when I do it will straighten up. If not, the internal baffles should be sufficient to straighten the sides especially after the top is welded in. |
 |
| I make a few mistakes. I was having trouble with the inside corners. I was not waiting long enough to reeled where I missed a bit or left a gap. You need to let the work completely cool before re-welding or adding an additional bead. I cleaned this outside corner up very nicely. Now the top piece (in this view) had the bevel around the edges so that when I welded, I just filled up that "V" groove. This is cleaned up a bit but it went very well. There is still a bit of warpage on the sides. See April 18. |
April 18,
 |
| The second tank was built over the weekend. I left it on this jig (some 2x4s that hold the sides square that are under the tank) for a few days. The sides held closer to 90 degrees than the last one. I'm going to put the other one back on the jig and see if it won't straighten back up as well. |
 |
| The 1/4" plywood in the middle of the figure is a pattern for the forward part of the black water tank. It fits perfectly. |
 |
| Another 1/4" plywood pattern for the rear part of the black water tank. It fits perfectly after a bit of adjustment. |
The next problem to solve is creating the bend in the bottom piece of the polyethylene. It is a bit too much curvature to force in place. I could but there would be a lot of tension. I'm going to make a mold and and try to heat the material to close to 280 F (138 C) to create the curvature. My plan is to use a forced air propane heater at somewhat close proximity to heat the plastic.
April 24,
 |
| I've made a form that matches the hull where the black water tanks will sit. I've clamped the HDPE to the form. It is not that bad of bend after all and we might get away with just cold bending but I think it will be better and easier to try to make a permanent curve by heat forming. |
 |
| The temperature to reach placidity for HDPE is 280 F (138 C). I figure I can get away with a lower temperature held for a longer time. I'm using a forced air kerosene heater typically used on construction sites. At close distances, I can probably get the plastic to 280 F (138 C) but nut uniformly. So I'm moving the heater around slowly to get the plastic to where it is fairly hot to the touch (much less than 280 F). At this point, the plastic is a bit softer and the stress of bending will allow the molecular chains in the plastic to slip. When cool, the plastic should (and did) retain most of its shape. |