April, 10
Construction on the interior continues. I am currently trying to get all the plumbing to the showers and vanities hooked up which means finishing the shower pans. The pans will be glassed smooth and painted white. I'll extend the glass up and under the heads to make cleaning easy.
 |
| Looking down on the shower drain. I have used a router to make a cut-out for a standard (US) shower drain and screen. The corners of the shower are angled for easy clean-up. Bottom right is the door jamb on the hinge side. So the door will open out. |
 |
| Jambs completed on the starboard shower. Right section is not epoxied yet. I still need to finish the door jambs for the walk through from the salon to the cabin area. That jamb will also support the narrow wall to the right of the shower. |
 |
| Plumbing run from (foreground) the port forward vanity to the port shower drain to a Tee that goes (right) to the shower sump and (left) on to the starboard shower. Sanitary Tees are being used throughout. |
 |
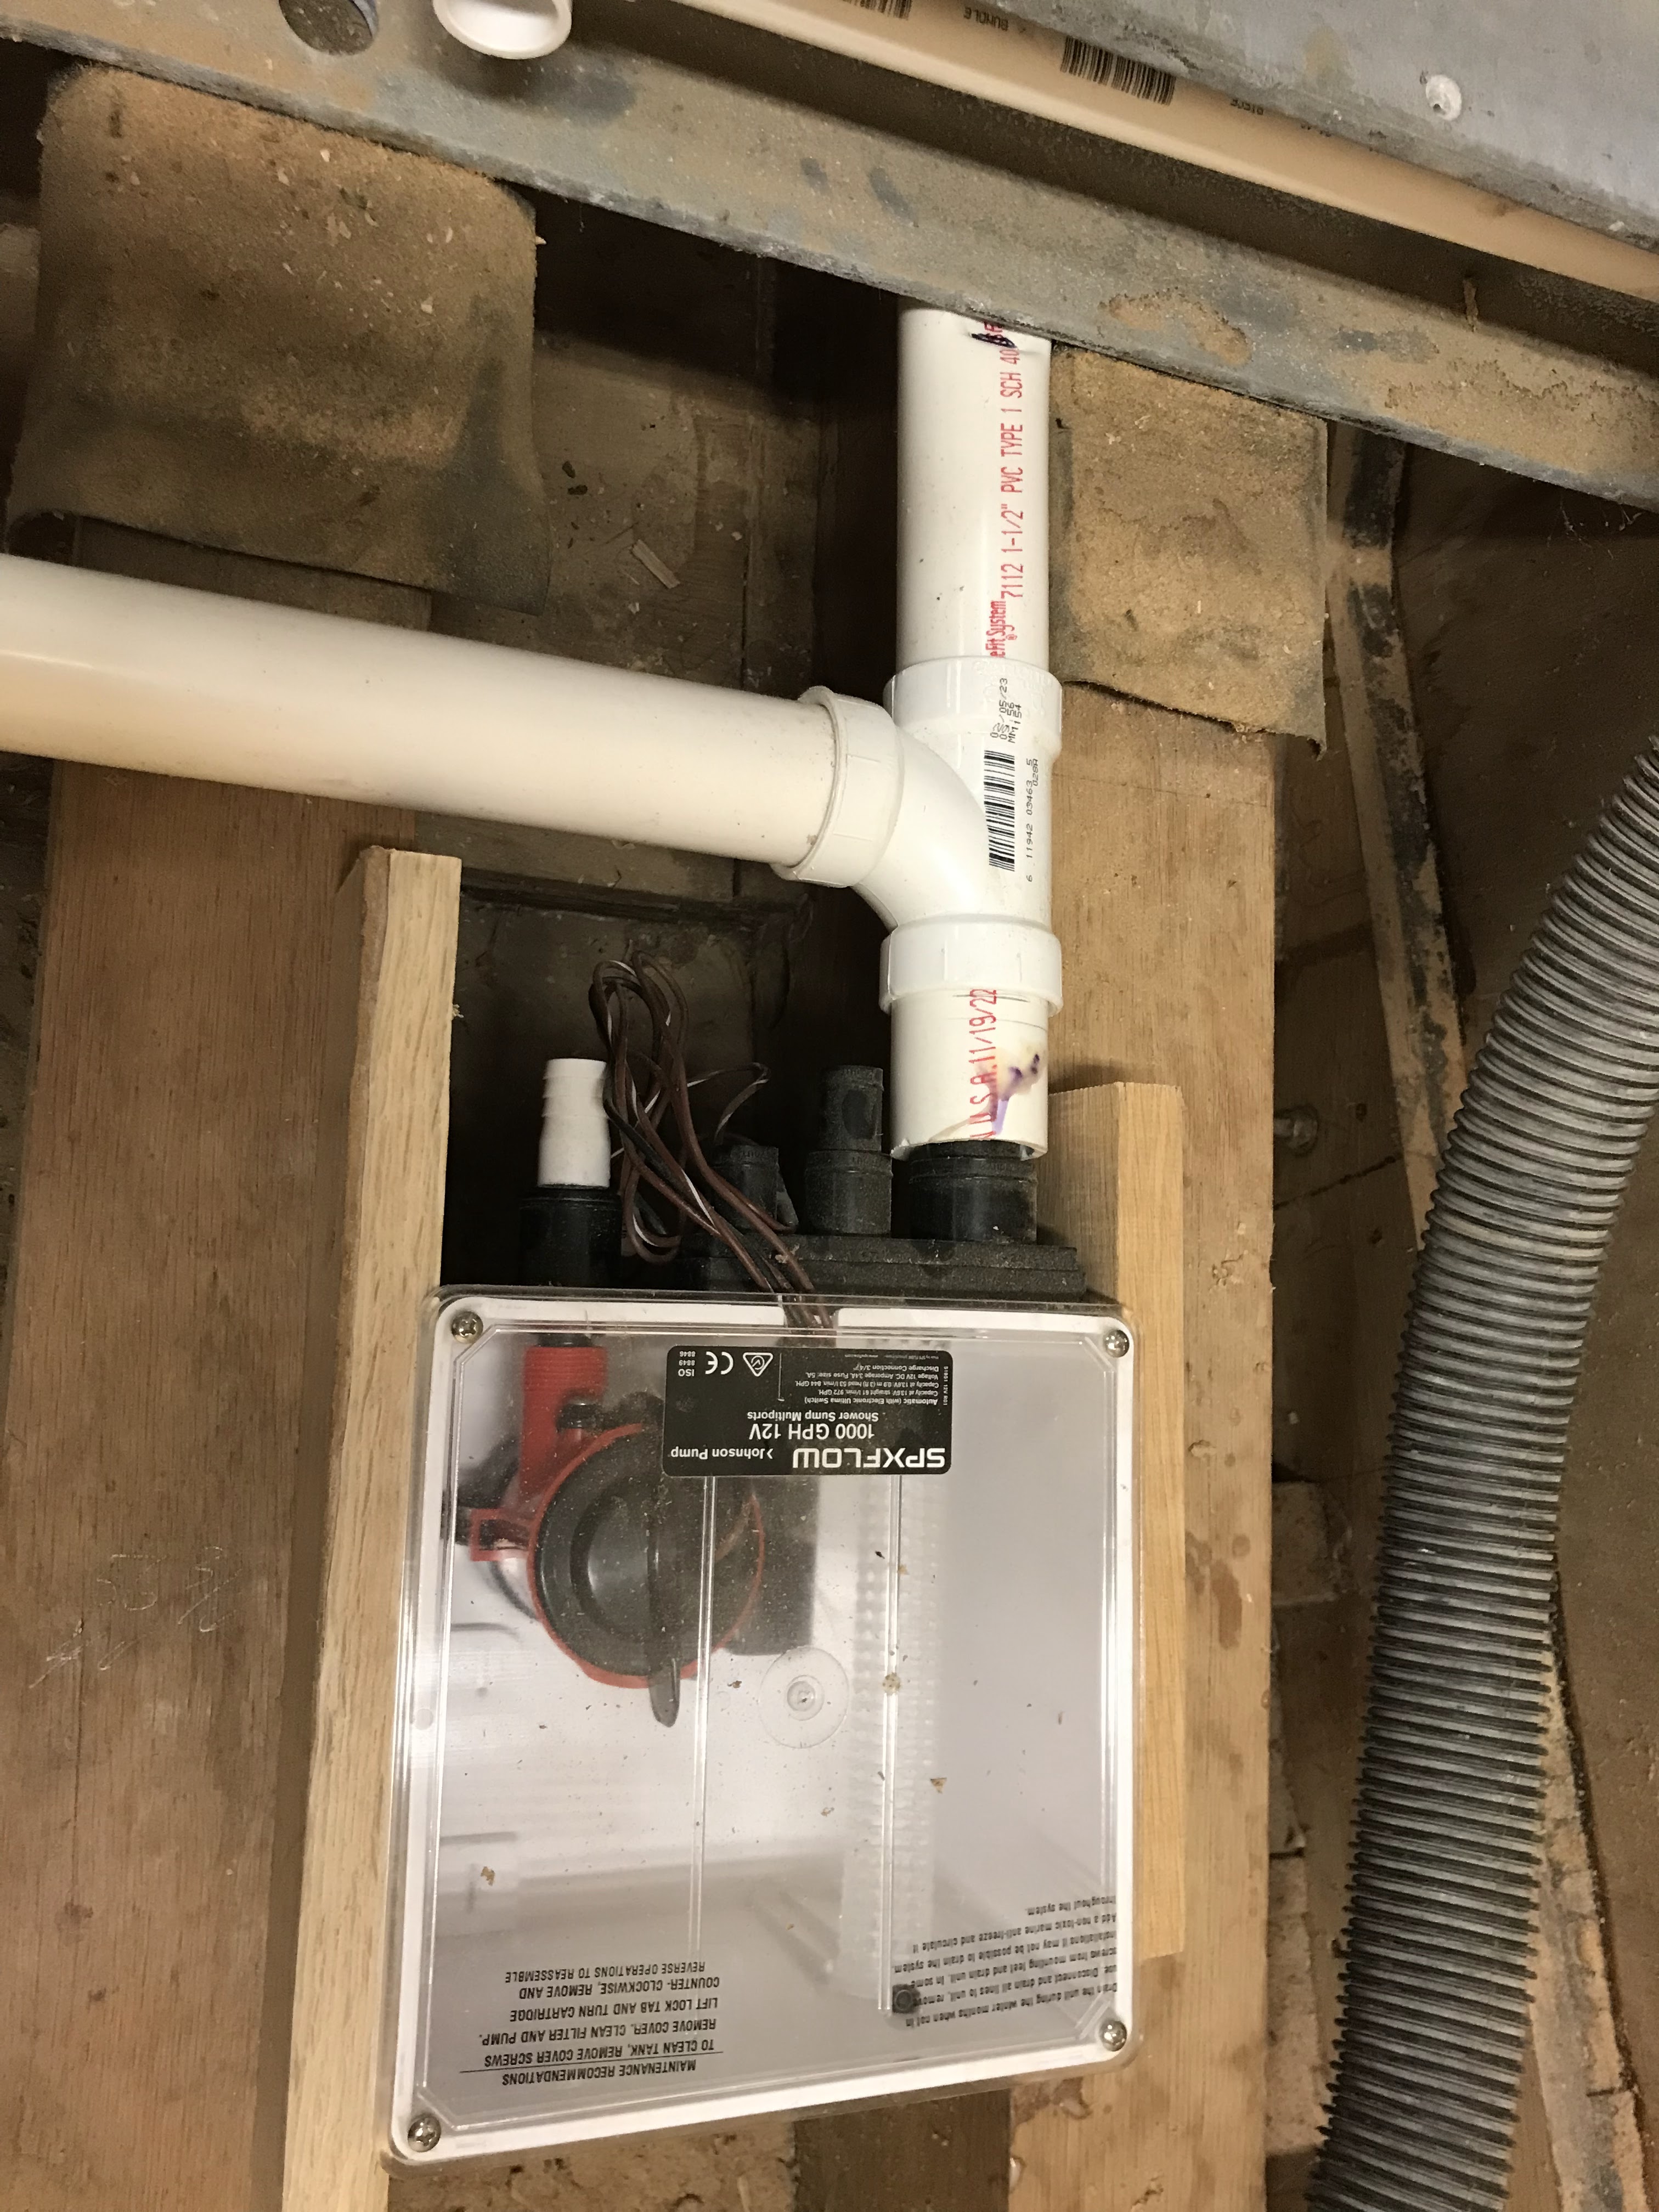
| A close up of the shower sump with rough connection. What if there is not enough room to get the pipe under the "H" beam? Water will not flow uphill. PVC can be heat shaped. |
 |
| I heated the PVC pipe with a hot air gun and clamped a block on the top once the PVC got a little soft. This method retains most of the cross section area of the pipe while allowing it to fit under the steel "H" beam without a dip in the pipe that will collect debris over time. |
April, 23
I have temporarily placed boards that define the cabinetry associated with the starboard berth. Since the floor falls aft, the bottom horizontal board is actually tapered so the cabinets and berth will be level. The drain for the starboard shower is dry installed (needs to be glued) to make sure everything fits correctly and gravity feeds to the shower sump pump.
 |
This is the starboard cabin. Left is the berth with cabinetry below. There will be three drawers across the top with three cabinets below each drawer. The drawers will be deep. The two cabinets on the right will have a common shelf in the middle.
|
April 29,30
 |
| Half lap joints work very well for the cabinet fronts. I used a router for the pockets and a dado blade on the radial arm saw for the half lap. I curved the corners with an end sander so I don't have to square the pockets with a chisel. Saves a lot of work and it doesn't have to be perfect because you can't see that side. |
 |
| This is the back side of the cabinet front lightly set together to check tolerances and fit. I'll glue all this up and screw it together with 1/2" stainless screws from the back. |