January 13,
It's a new year but the goals remain the same. Keep on working.
 |
| After adding all of those 5/8"x1" strips along the rafters, I can start putting up the ceiling. This is some old southern yellow pine bead board plywood that I had laying around. It is not really in all that good condition and I won't actually use it but I put it up temporarily so I could work out the finish I wanted to use. The exposed rafters will be varnished so I was going to either paint the bead board or stain and varnish it. I think I'm going to use a golden oak stain and varnish. If I dislike it in the future, I can always revert to paint. |
 |
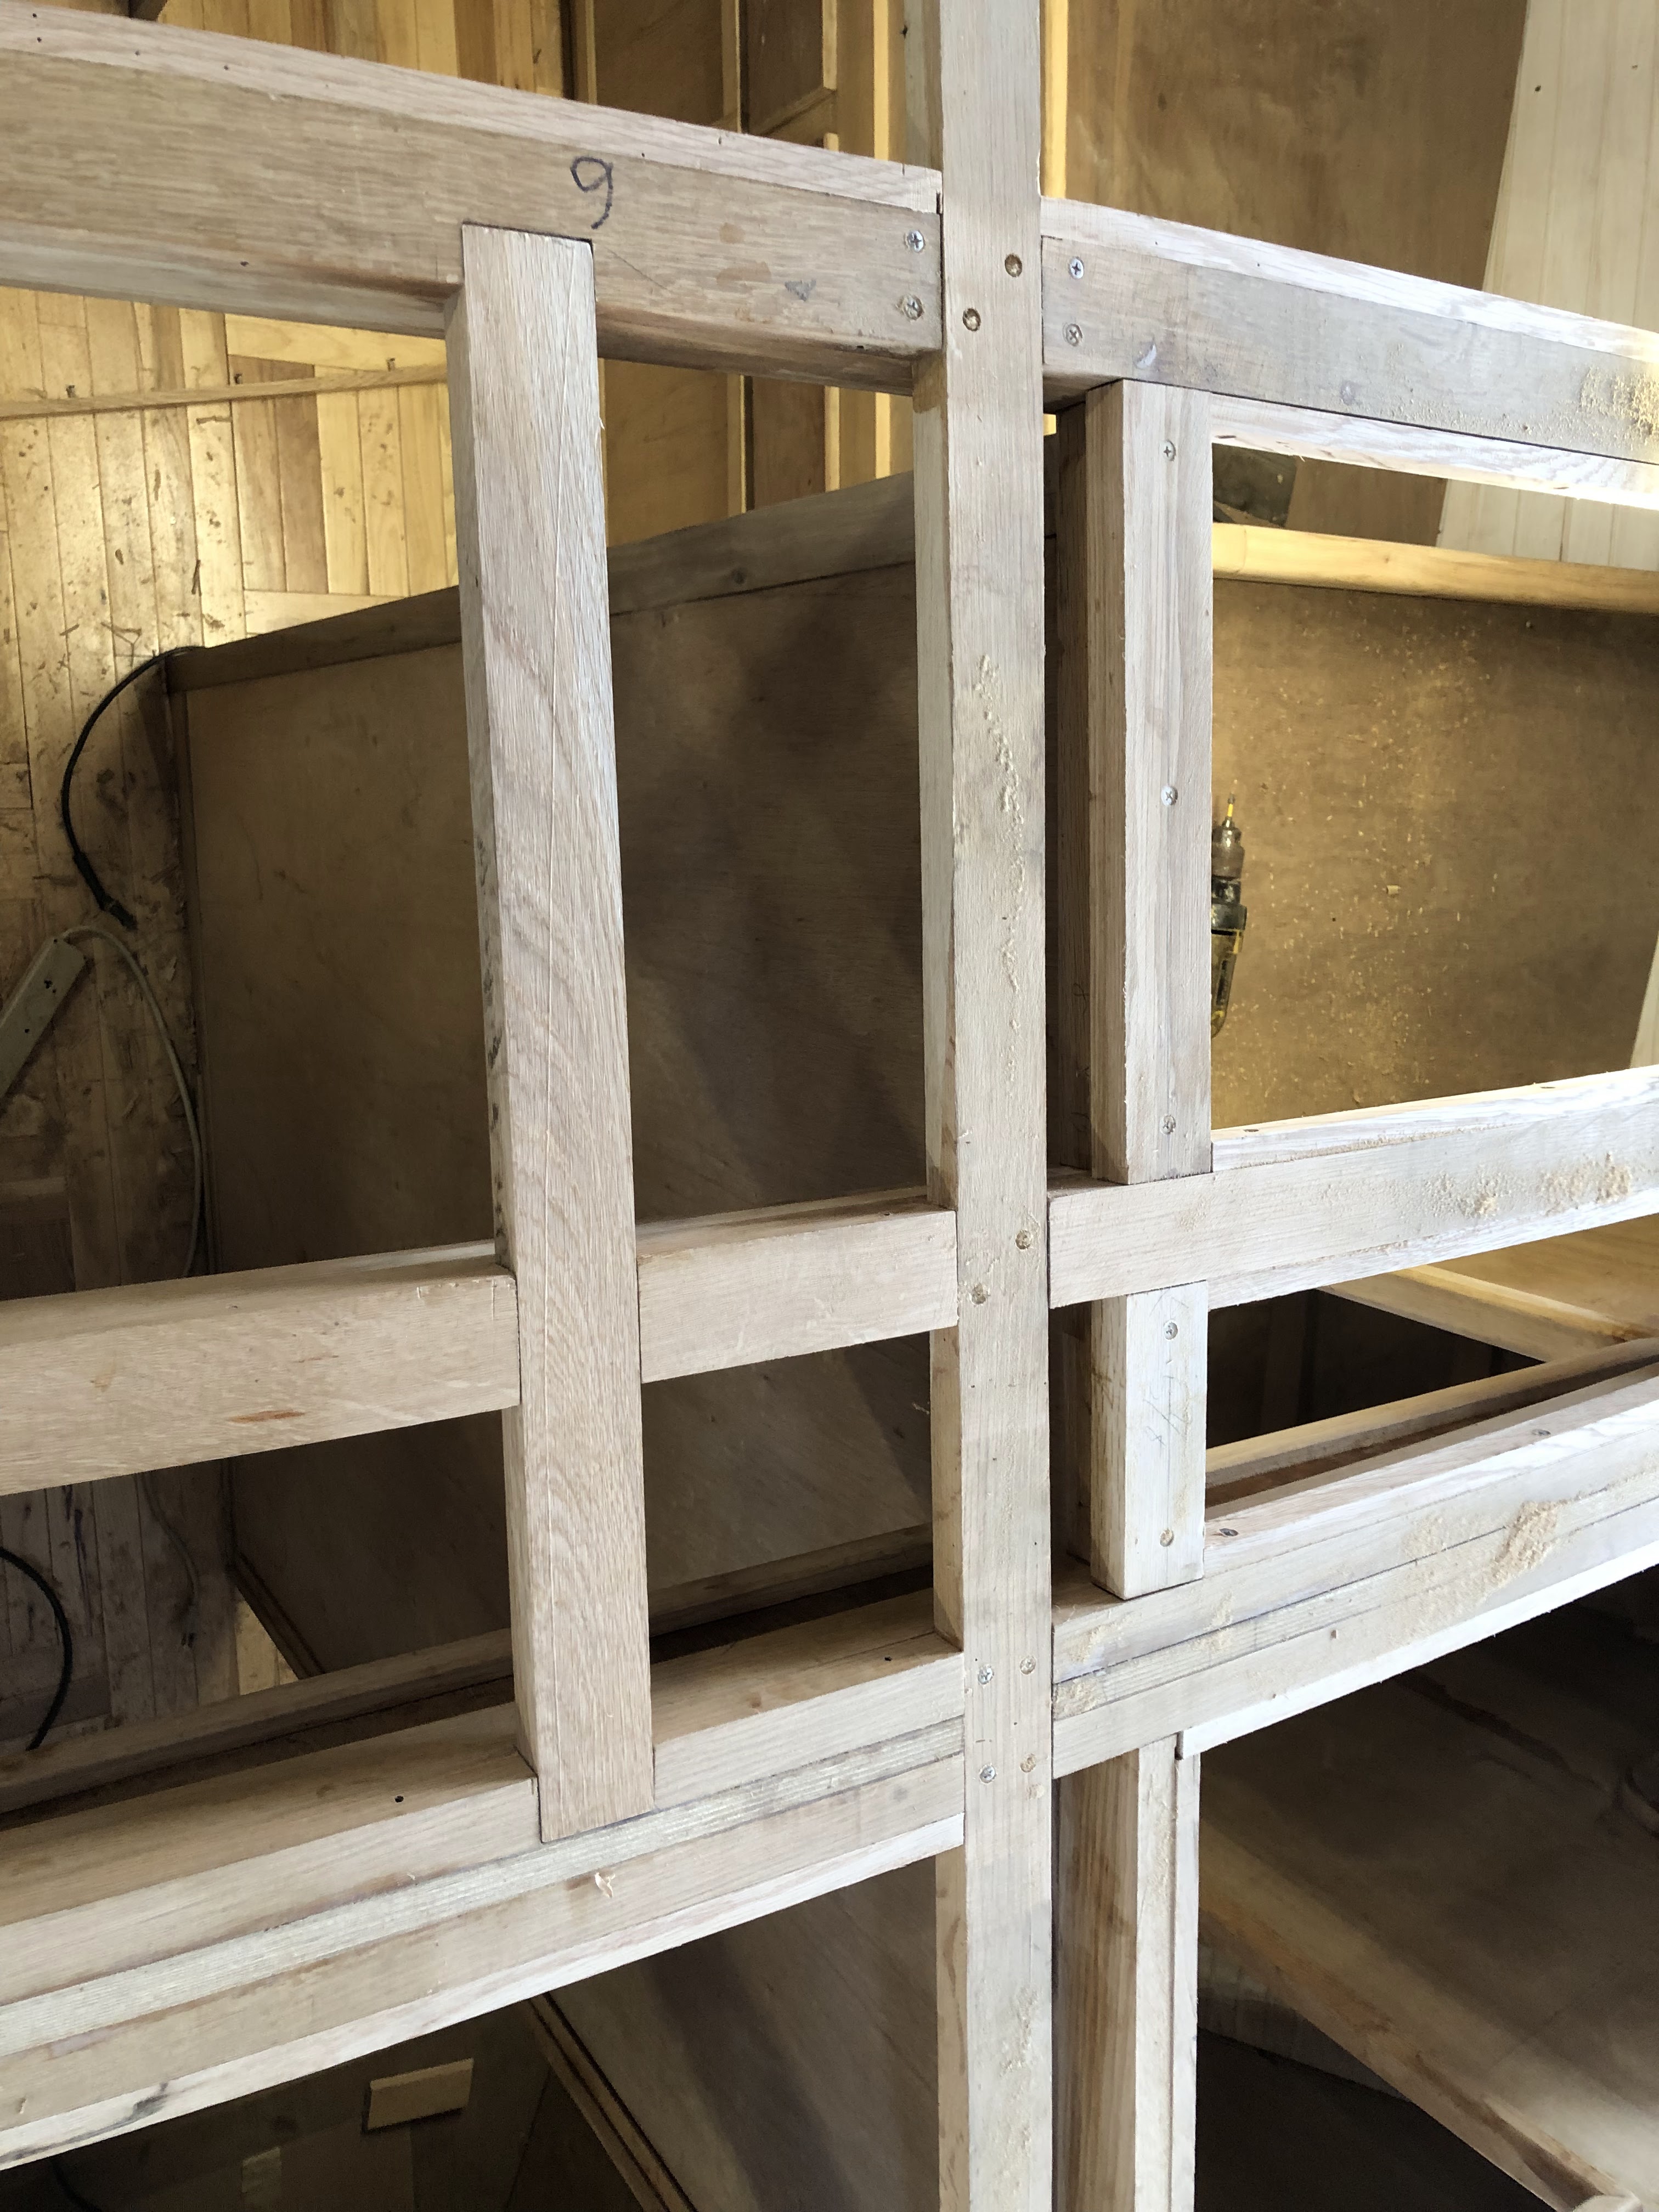
| This is a top view of where the main mast will come through the cabin ceiling. The center (going horizontal) rafter in this photo will have to be cut along with the center 1x2 which would leave the rafter hanging on the starboard (left in this photo) side. The other side is supported by the wall. I added another 1x2 to the left of center in order to support the rafter. I have not drilled for screws yet (in this photo) and I have not epoxied it in place since it was way too cold for epoxy work. Cutting the rafter makes more since than having it in an alternative location because the spacing is essential for where the cabin top plywood will be attached. I hate ending up cutting up sheets of plywood to fit oddly placed rafters. Maybe this is more of personal preference. |
Jan 26,
Finally got a chance to work on the sliding door... but first some sole news.
 |
Yes, finally working on the cabin sole in the living area. The hard part is working out where and how the hatches are going to be placed. The long hatch at the top of the photo will give access to the plumbing and keel bolts. At the other end, the hatch will access the water pressure pump. The square hatch in the middle is for access to the shower sump cut-off valve and the black water tank fill level sensor.
|
 |
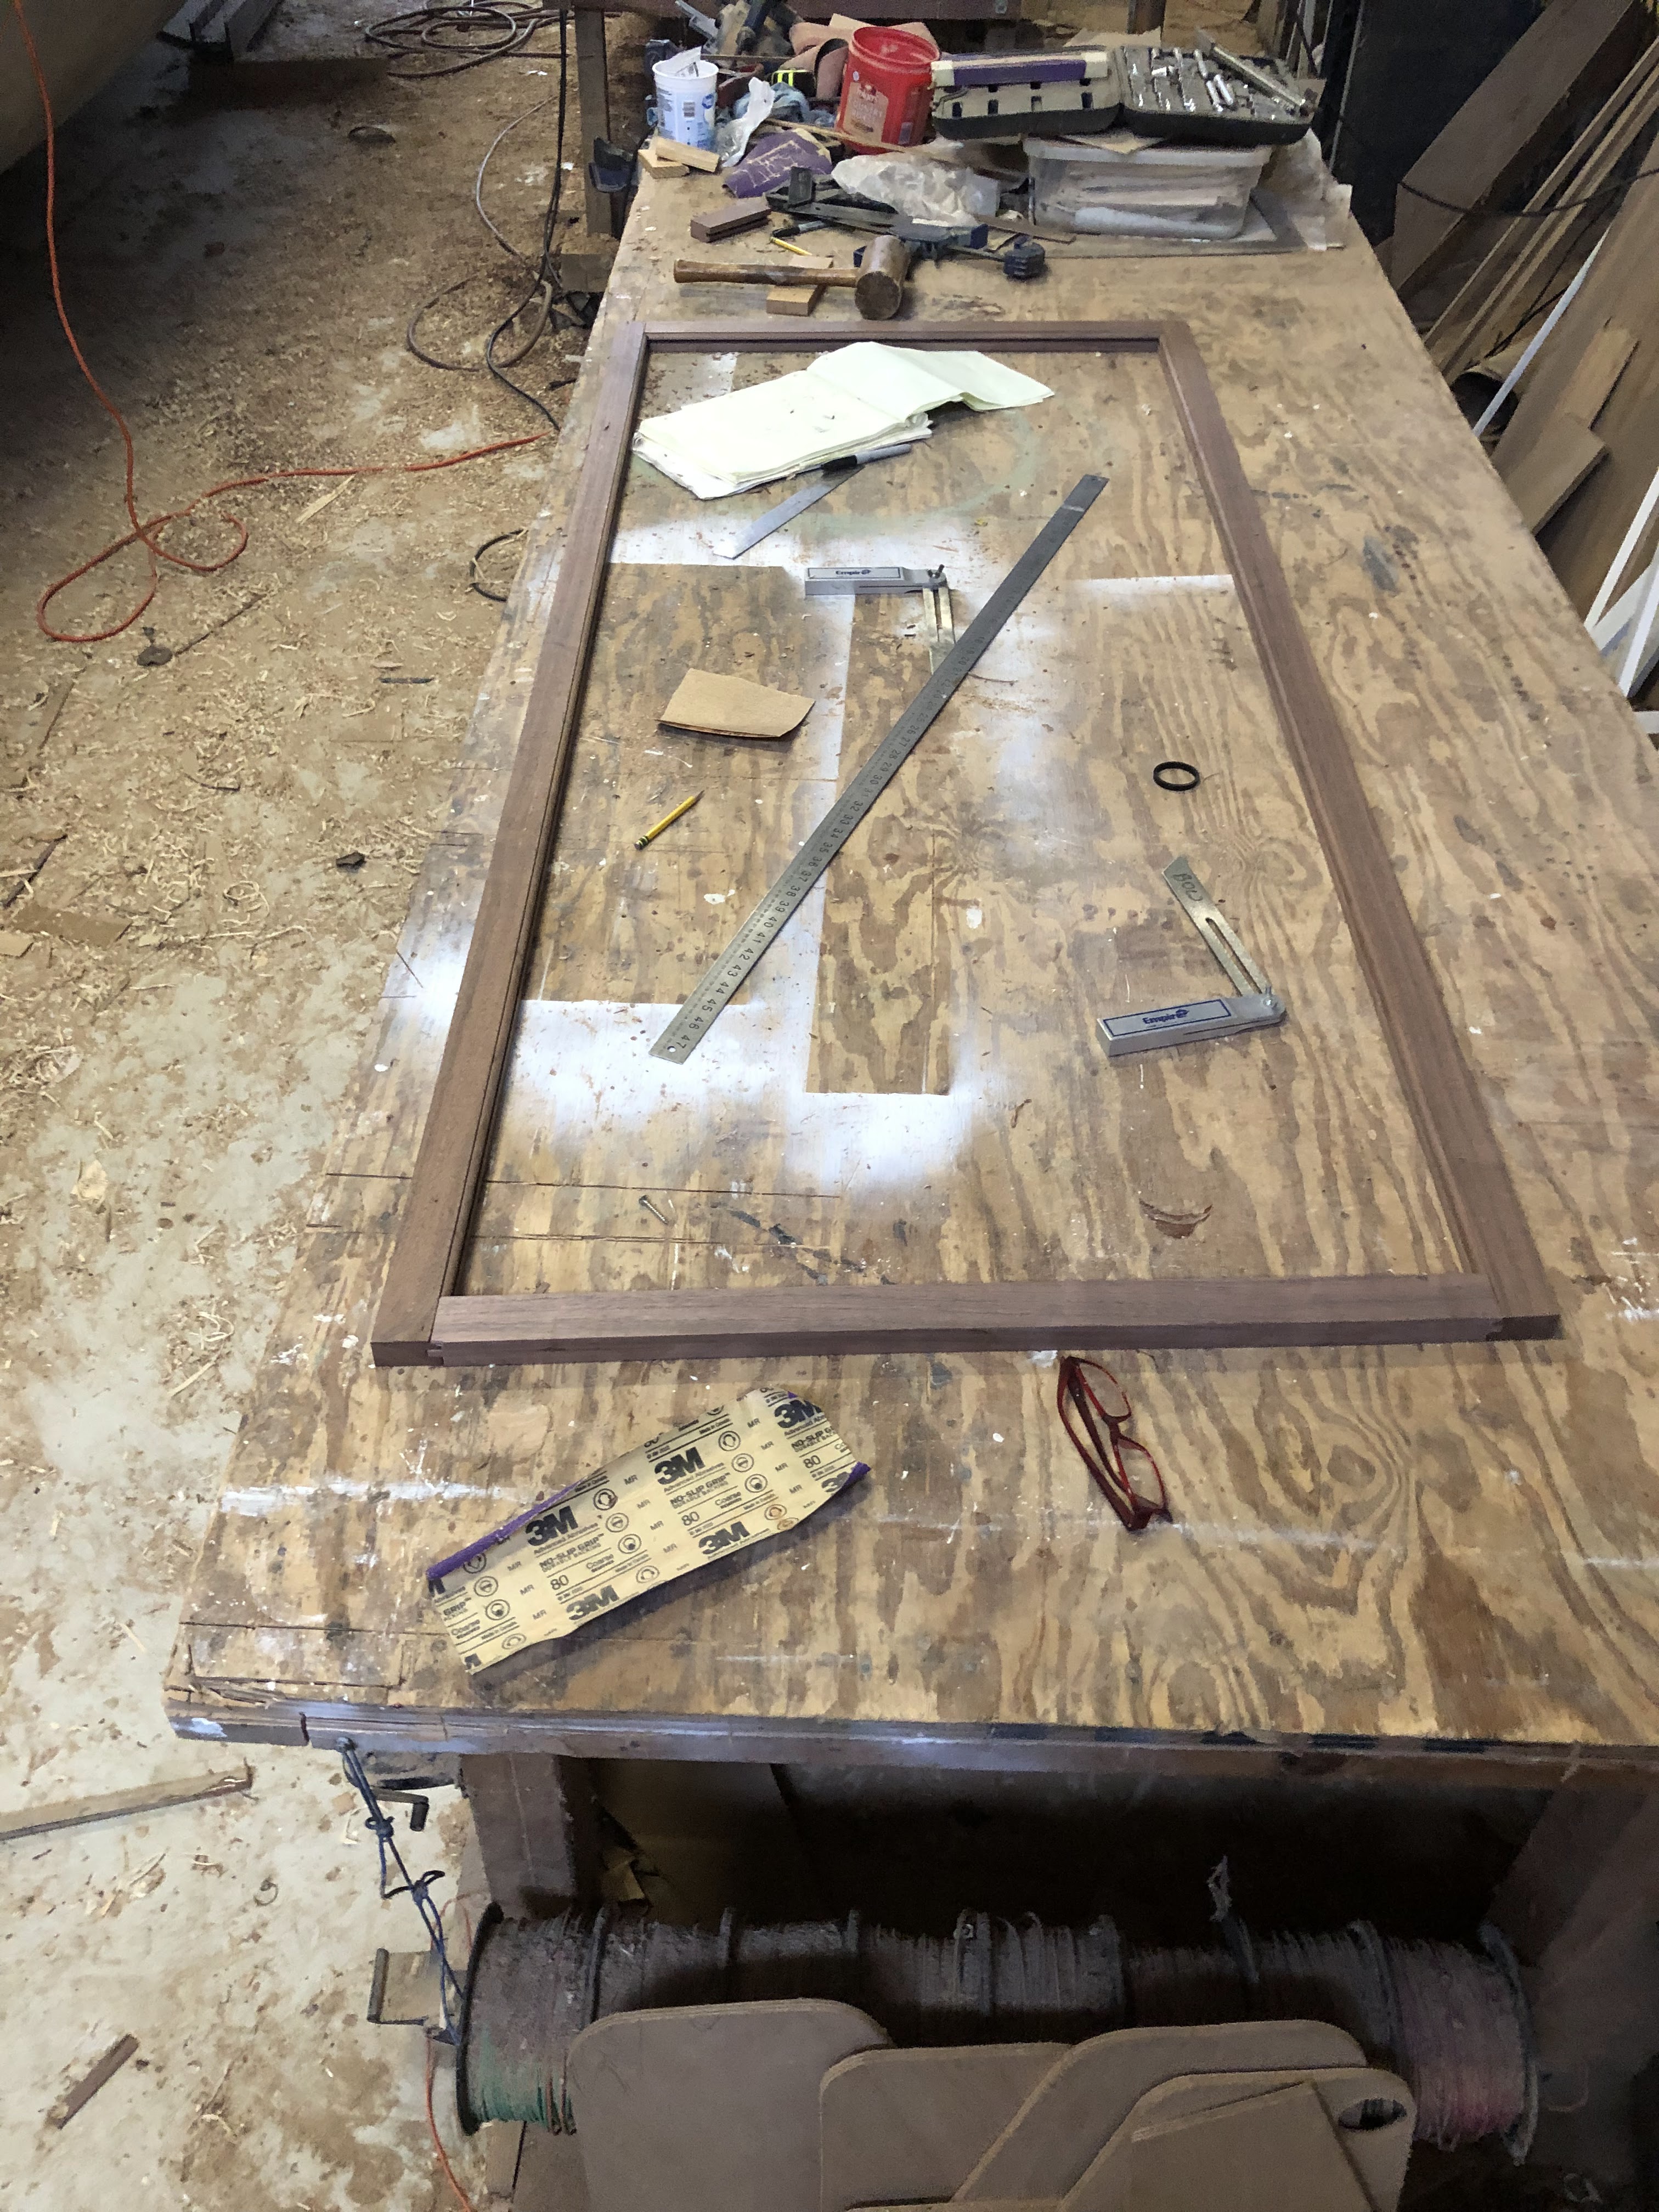
Rails and styles for the sliding door out of black walnut. This is not square but a slight parallelogram to match the slope of the cabin sole.
|
 |
Panel dry fitted.
|
 |
Aluminum rail that the sliding door will hang from. I've made sliding bearings that fit that groove out of HDPE left over from the tank construction. HDPE is pretty slippery and with a little silicon spray, I think they will slide nicely.
|
Jan 31,
I finally got the rest of the sole purchased. Again, I had to order it but I got an amazing price. This stuff had been going for $150/box and I found it for less than $100/box.
 |
Working out the pattern and the hatches that I'll need. I'll have to have access to the keel bolts and valves for the fresh water tanks. That is the long hatch in the upper middle. I will also need access to the fresh water pump and another access to the level sensor for the black water tank. All of that access will also get me to most of the plumbing in that area.
|
 |
Rough laid to make sure everything works well.
|
 |
I have labeled all the boards so I know exactly how to put them back in during final assembly.
|
All the hatches have been made and fit. The salon area is laid permanently, but I still need to make final adjustments in the galley.
After I tighten the sole up, I plan on finishing the sliding door to the port cabin. Then I will be ready to install the ceilings. These need to be installed so I can work out all the lighting and electrical runs for said lighting. Fun days ahead.