Tuesday, December 3, 2019

December 2019

December 3

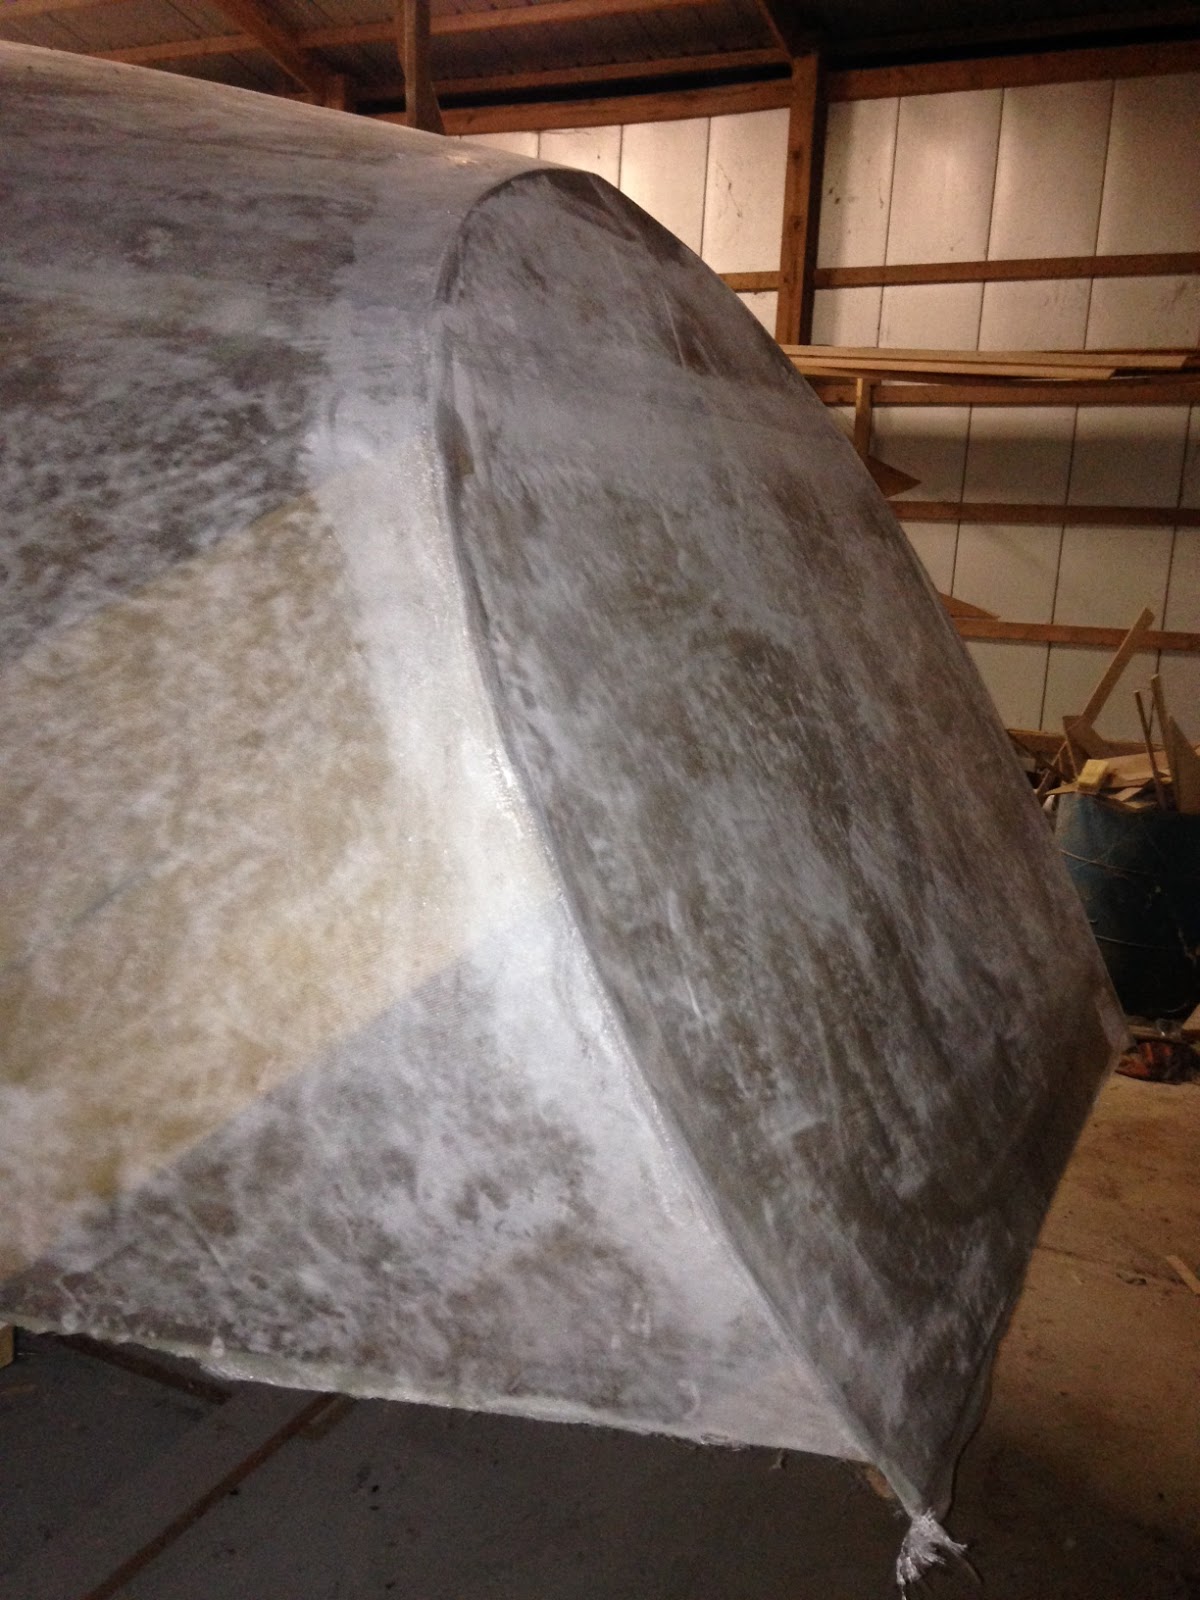
Well, I finally finished up the hull and all that sanding.  I went over it pretty well and filled all the little pin holes and dimples.  I'm sure I missed one but I'll find those before the paint goes on.  Right now it's time to prepare to flip hull over and start working on the inside.  To that end, I've removed all the scaffolding that will be in the way leaving just 30 feet on the wall side to attach pulleys and have people stationed for the flip.

Flipping the hull is a bit of a misnomer.  I'm actually building a jig so that I can roll the hull over until it is right.  I will use six 2 ton chain hoist.  Two to roll the hull over and they will initially be attached to the keel and two of the 6x6 posts.  Two also attached to the keel but pulling the opposite way to prevent the hull from rolling back (I might get away with using one ton hoists here).  Two attached to the pivot point on the ground to ensure the boat rolls instead of scoots.

A nice view from a ladder near the shop corner.  That's Fig in the door way.  He likes to help.

The hull looks even larger when not wrapped in scaffolding.
The first thing was to get a roundish outline to build the rollers.

Adding 2x10s to follow the outline.  This probably would have been easier to use an octagon but the round roller has fewer stress points and easier balancing points to take a break.


I took the aft one down and made an identical one for the front.  I had to customize it a little  to fit properly.   The trick was to make them identical.  Now it's time to layer on the wood for strength.

Making progress.

Essentially we have two layers of 2" lumber with 3/4" plywood sandwiched in between.  I've maintained contact with the hull as much as possible in at least the plywood and one layer of 2" lumber.  All of the joints will be through bolted together.  It will be bolted to the gunwale, building jig frame and into the keel.     

I almost forgot I needed to install the skeg keel stump.  This is the first of 5 or so pieces that make up the skeg keel.  The rudder will attach here as well as the prop shaft.  I need to install this before flipping the hull to ensure that I get the bolt holes drilled correctly.  I shaped the face that attaches to the hull a bit so that there was only a small gap.  I used two layers of woven glass between to make up the small gaps.  One thing I did a little different is that I used thickened epoxy (pea-nut butter consistency) just inside the edge of where the keel stump mates with the hull.  This held the glass in place and acted like a dam for the un-thickened epoxy.  I used temporary bolts to create pressure to squeeze out all the air and used aluminum tape around the seam so that the epoxy would not seep out.


It was very important to make sure that the skeg keel is perfectly in line with the hull.  I also used a sensitive bubble level to ensure that the skeg was not tilted to one side.  I tightened the bolts a little one after the other ensuring that I brought the skeg back to level each time.
 After the epoxy became tacky, I removed the tape and used thickened epoxy to make a fillet around the seam.
The fillet looks a little rough but it won't take much to clean up.  Having the seam a little tacky really made filleting the joint difficult but now I'll have a chemical bond between the epoxy and fillet joint.  I also had a little glass sticking out of the joint which ended up in the fillet.  That just means more strength.  

Tuesday, October 8, 2019

October 2019

October 6

We had a fabulous work day today.  A whole bunch of folks came out to roll on more epoxy, drink beer, eat and be merry.  We worked hard though and managed to get 3 pretty nice coats on... the final three.

We rolled on a nice coat of un-thickened epoxy first thing in the morning.  After lunch we mixed a heaping half cup of West System 422 barrier coat to 600 grams of epoxy and then added 120 grams of hardener.  The 422 thickened up the epoxy quite a bit so the next two layers are a bit thicker.  We also had a bit of trouble keeping the epoxy from setting up in our roller pans.  I think the 422 additive changed the thermal properties of the epoxy in the pot.  We went through quite a few roller pans having to throw out the ones that started to cure up.  Instead of heating up and smoothly transitioning into a hard state, the epoxy took on a texture that seemed like a bunch of spiderwebs were mixed into our pans.  Adding more epoxy early stopped the reaction but only temporarily so we were forced to throw out the roller pans when this started to happen.

For the most part, the finish looks great with just a hint of orange peal.
A close up of some of the worse orange peal.  The swirls above are from the 1/4 sheet palm sander.  Most of the hull is much smoother.  This is from the side that we did when we were tired and had difficulty controlling the cure time. 
This is fairly normal and just means that the texture of the surface takes on the appearance of the peal of an orange.  Sanding with 60 grit on an orbital sander quickly gets the finish smooth and then I'm following up with 80 grit.  80 grit alone is sufficient but it goes quicker with a light 60 grit sanding followed up with 80 grit.  Remember that the 422 additive makes the epoxy more abrasion resistant i.e. sanding will be more difficult.

I noticed one spot, about the size of a lap top, that was missed with the third coat.  I plan to lightly sand and re-role that area and any more that I find.  We were pretty tired by the third coat.

A view of the bow with just a single coat of plain epoxy. 

I found other issues like the bow section in the image above.  We had a lot of goopy epoxy that was starting to firm up on this section.  Basically some shallow lumps.  I got out my 5" orbital with used 60 grit paper and it did a wonderful job smoothing it right out.  Followed by a quick sanding with the palm sander with 60 grit ensured I got a fare surface.  Because there was some thickening in the epoxy, the final layer was thicker and could take a little extra sanding.  The results were better than I expected and there is no reason to re-roll this are.


It felt pretty good to be finished with the day.  That is my wife Laura on my right.  She is always helpful.

October 10,

After scrubbing down the hull with soap and water, sanding commenced.  It really seems to be a chore to wash this hull down.  I've done it many times by now and I suspect I'm going to keep disliking that job.  When it is finished, maybe I can get my wife to take over, she even likes washing cars.  The figure below shows the sanding on the side and bottom aft of the hull.  I started with 60 grit on a small 1/4 sheet orbital sander.  It works pretty well at getting the finish smooth as you can see in the picture.  I've already sanded to 80 grit near the transom.  I'll probably go over it all lightly with 100 grit before I'm done.
October 14,

I've almost completed the initial sanding of this side (above picture) of the hull.  It looks great.  There are a few small places that are going to require touch up but that's normal.  There is another area on the bottom of the other side about the size of a writing desk that seemed to not get the tip treatment.  I've lightly sanded that down and will re-roll with the other small areas.  Careful inspection of the other side did not reveal any issues at all.  I think that side will sand down much easier.  We were much fresher on that side and the temperature was cooler.  I may have pushed my help just a little bit too much but they are great people and the results will be fabulous.

October 16,

Still sanding... and sanding.  It is pretty hard work.  Not as difficult as using the belt sander and without all the fiberglass itching issues.  I should never see the glass again but I still have to put some muscle into the palm sander.  I have a 5 inch orbital that I've use (see above) in a few places where the epoxy got applied poorly and thickly but that tool is hard to hold and you need to keep it moving. It also might take off too much epoxy so I'm happy with the steady but slow progress of the palm sanders.

October 21,

I made quite a bit of progress over the weekend.  I still have a bit to do but I think in another week or two, I'll be ready to start building the structure to roll the boat.  This is an exciting and frustrating point.  I've always said that you take the building process one step at a time but when you're this close to completing a major step, your mind naturally wanders to the next step.  In some ways that's good because it is necessary to fully realize your next step before you take it.  In other ways it's bad because it makes you anxious to be through and that can make you rush critical work.  At these times you just have to take a deep breath and step back and find that Zen of working in the moment.

October 28,

I got through the rough sanding over the weekend.  I also recoated the few areas that needed it.  The epoxy with the barrier coat additive was very hard to roll.  It was 60 degrees F (15.5 degrees C) and I was using the fast hardener.  I think the temperature was the issue.  It was like rolling molasses.  This was fine for the one large area but it quickly became apparent that I should be using a brush on the smaller areas.  This worked much better.  I just had to follow up a few time to take care of the vertical areas where the epoxy had a tendency to slump when spread too thick.  I just lightly brushed the slumped parts back to where they belong with a near dry brush.  This remove some thickness as well as fixed the issue.  Once the epoxy became tacky it will stay were it belongs.

I've also been talking about using the orbital sander almost exclusively for finish sanding and with the filler.  I would have liked to use a long board sander for the filler but I just don't have a set up for that.  The long board would help reduce subtle ripples that I can still feel occasionally along the hull.  I think I'm going to have to live with them.  Once I put the first coat of primer/paint on the hull, I'll address anything that stands out.  I really think the hull is going to look great regardless.  The long board sanders are an expensive setup requiring a commercial grade air compressor for continuous operation.  If you've got the equipment use it during the fairing phase.  Otherwise the orbitals work pretty well.

The next steps will include a wash down with soap again to remove the blush and reveal any more pits and dips that need filling.  Sand down the new epoxy with 60 grit using the orbital sander.  transition to 80 and then 100 grit for the final finish.   

Monday, September 23, 2019

September 2019

September 23,

Sanding, sanding and more sanding.  Spreading on the glazing and sanding it off and repeat.  We are getting close to adding more layers of epoxy... the last layers.  I'm trying to make sure the hull is a smooth as possible so these last layers really go on smooth.  The finish should only require some light palm sanding prior to paint.

Slowly moving over the hull adding a skim coat of glazing.  You can see the raw application that looks pale yellow awaiting sanding.  Above that is where I have finished sanding.  In the foreground  where I have not yet applied the glazing you can readily see what I'm trying to do.  The rough sanding left the high parts looking dusty white while the low parts are still a bit shiny or darker.  These are the areas I'm targeting with the glazing.

Moving on to the bow section.  You can get an idea of how thick this glazing is although its fairly transparent when thin.  Small scratches and dings fill easily and require very little sanding.  Larger dimples and grooves require a little more sanding but it goes pretty quickly.  Sanding with a palm sander is such a pleasure after that heavy belt sander.  It just takes time and patience but almost no effort.  It's almost like meditating.  If your in a hurry, you should not be building a boat. 


The glazing is the two part product that I mentioned before.  I've had additional issues with not getting enough of the cream hardener mixed and ended up having to redo another section.  I've sense learned that almost any cream hardener designed for plastic filler (glazing or filler like Bondo) will work.  I bought some at a local auto parts store that sells paint and body working supplies.  It was a red cream hardener made by Bondo (a 3M company).  It worked very well.  The red was very intense and I was able to get a much better sense of the mixing proportions.  Plus I can add more than needed without fear of running out.  Basically, I use about 120-140% of what I think it needs and it works out pretty good.  This doesn't even seem to shorten the pot life any so there really is no down side.  I purchased a third gallon of this glazing and to my surprise it came with an extra 1 oz tube of cream hardener.  What's more, this cream hardener was brilliant blue and acted very similar to the red Bondo product.  It was almost like they read my mind.   If I need a fourth gallon (hopefully not) I'll toss the pale blue hardener in favor of the locally purchased red stuff.  It just makes it easier and less stress.

I've scheduled the next boat work day on October 6.  We'll roll on one layer of epoxy over the glazing and then put on two additional coats with West System 422 barrier coat additive.  This additive is designed to help make polyurethane more water resistant and durable.  The epoxy I'm using is already much more water resistant than polyurethane but it's not that expensive and the added abrasion resistance should come in handy.

After October 6, the hull will need a light sanding.  I plan on having another work day where we get about 5 people over with palm sanders and spend a few hours knocking it out.  Then the hull should be ready for a quick coat of paint before we flip her around.   We are certainly on schedule for completing this flip by the end of  the year.  Then we start on the inside.  Stay tuned.

Friday, July 5, 2019

July 2019

July 5

Today I spent the whole day sanding the boat hull.  Now I can't lift my arms.  Mostly true, sanding is hard work even with the best power tools.  Worst of all, as you get tired you can't keep the tools firmly on the work and you make mistakes.  Take lots of breaks.  Your good working time between breaks will decrease as the day goes on but fixing a mistake where the belt sander digs into your glass is a lot of work.  I've managed to avoid those type of mistakes but every once in awhile I let off the pressure and the belt sander skips scuffing up a place that may or may not need attention later.  The worse places is where I have to hold the belt sander on a vertical surface.  Gravity in not your friend at that point.  This beast weighs 13 pounds (5.9 Kilograms) and after about 30 minutes feels more like 50 (pounds or Kilograms it doesn't matter).

Sanding is slow going.  Plus that belt sander weighs a ton.  Notice the mottled look to the hull.  There are still dips and undulations that I'd like to fill and can not be sanded out without cutting into the glass.

I'm experimenting with skim coats of automotive filler.  What is generally used by the industry is a glazing putty or compound.  Unfortunately, glazing putties have very short working times and in the heat of Alabama basically about 15 seconds.  Good enough to skim a small area but anything else and you'd be wasting a lot of the product and the product is typically very expensive.  I've found another product that I'm experimenting with.  I 'm not sure yet how I'm going to use it.  The above figure shows a relatively heavy consistent coat.

This image shows a thinner spread with an occasional heavier spread.  Right now, I think this works better.  I've actually skimmed the entire area but the pale yellow spots are where I've applied a bit extra usually over some visual imperfection but sometimes that is just how it applied.  It's fairly difficult to spread thin and I'm learning to start with only a small amount on my putty knife.  Naturally, my technique is improving as I learn how best to use this product on such a large surface. 
The working time on this filler is suppose to be up to 40 minutes and cure to sand time 120 minutes.  First of all, in Alabama summer heat (95 F or 35 C) this is more like 5 minutes which is actually plenty of time.  Although one section I coated over 4 hours ago is still a little tender.  Too tender to sand so I think the it needs an over night cure.  I may not have put enough harder in but if I added more that would reduce my pot life.  Life is compromise.

Keep in mind that I'm planning a few coats of epoxy with West System 422 barrier coat additive over the top of all this.  It really does not enhance the epoxy water penetration properties as it's made for polyester resin which has lousy water resistance but it also makes the epoxy coat a lot harder and should resist scratches and dings better.  It's also only a few hundred dollars and that seems cheap insurance.

That hull is going to be slick when I'm done.

July 6,

The next morning, the filler is firm and ready for sanding.  I'll just have to skim coat sections and leave them overnight in the future.  I still have a lot of primary sanding to perform before I can even apply the filler.  Not today though, my arms are still rubbery and you need strong control over the sander to avoid having it skip on the hull and dig a gouge.

The following image is similar to above but I've given it a quick sanding with the belt sander at 80 grit  followed by a quick palm sander also at 80 grit.  I really like the results:

The product went on fairly quickly.  It required a lot of working to get the thin coat I wanted.  Make sure you only put a little on the trowel or putty knife at a time.  I recommend a steal knife around 6-8 inches like used in drywall finishing.  All the light areas are areas that have been filled.  All very shallow.


This is the product.  It comes with a tube of hardener that is pictured on the left.  I purchased it from Eastwood for around $67.  But google it, you can get it cheaper but shipping may even things out.  I've ordered quite a bit of stuff from Eastwood and never been disappointed. 
I'll add this important comment here:  This stuff is pretty toxic so keep it off your hands and use a good dust mask or respirator while sanding it.  Since it will be encapsulated in another couple of layers of epoxy I'm not worried about environmental impact.  

July 7,

So, I've been mentioning the short work time for this product (despite its claims) and I guess I subconsciously have been reducing the hardener to improve the working time.  The reason I say that is the goop I've got in the photo below is what happens when you get an incomplete cure.  This happened during a few batches on one area near the keel where I had laid up the filler a bit thick.  The 'cured' product was still rubbery after 3 days.  Sanding resulted in goop filling the grit on the sand paper and smearing over the work.  I used a few old sanding belts and powered through until it was all removed.  You can see at the top left of the photo where the sanded areas start to become white again, this is where the filler is completely cured again.  It's actually difficult to meter out the hardener and I've been relying on experience but each product is a bit different.  I'll make sure I err on the side of a bit too much next time.  At least the worst that can happen is that the filler hardens up on your pallet.  Of course you can always mix too much hardener and that may also give you a bad cure but I don't plan on getting carried away.  The instructions say 3-5% hardener by volume.  The only practical way to do that is by weight.  But I think I've got the hang of it now so I'll continue mixing by eye.  Oh and there is a tint change when adding the hardener so you can go by that as well.

A goopy mess because I did not add enough hardener.  I was probably subconsciously trying to increase my working time and got carried away.  I don't really remember what was on my mind at the time but I'll pay closer attention from now on.

Thursday, June 6, 2019

June 2019

June 6,

We have a big work day on Sunday.  A whole crew is coming over to roll and tip the barrier coat for the hull.  Keep posted for pictures and comments.

In preparation, I've washed down the entire hull and found a few small issues that require a little more sanding and one dip that requires a little filling.  I'll take care of that today, rewash those areas and we will be ready for barrier coating.

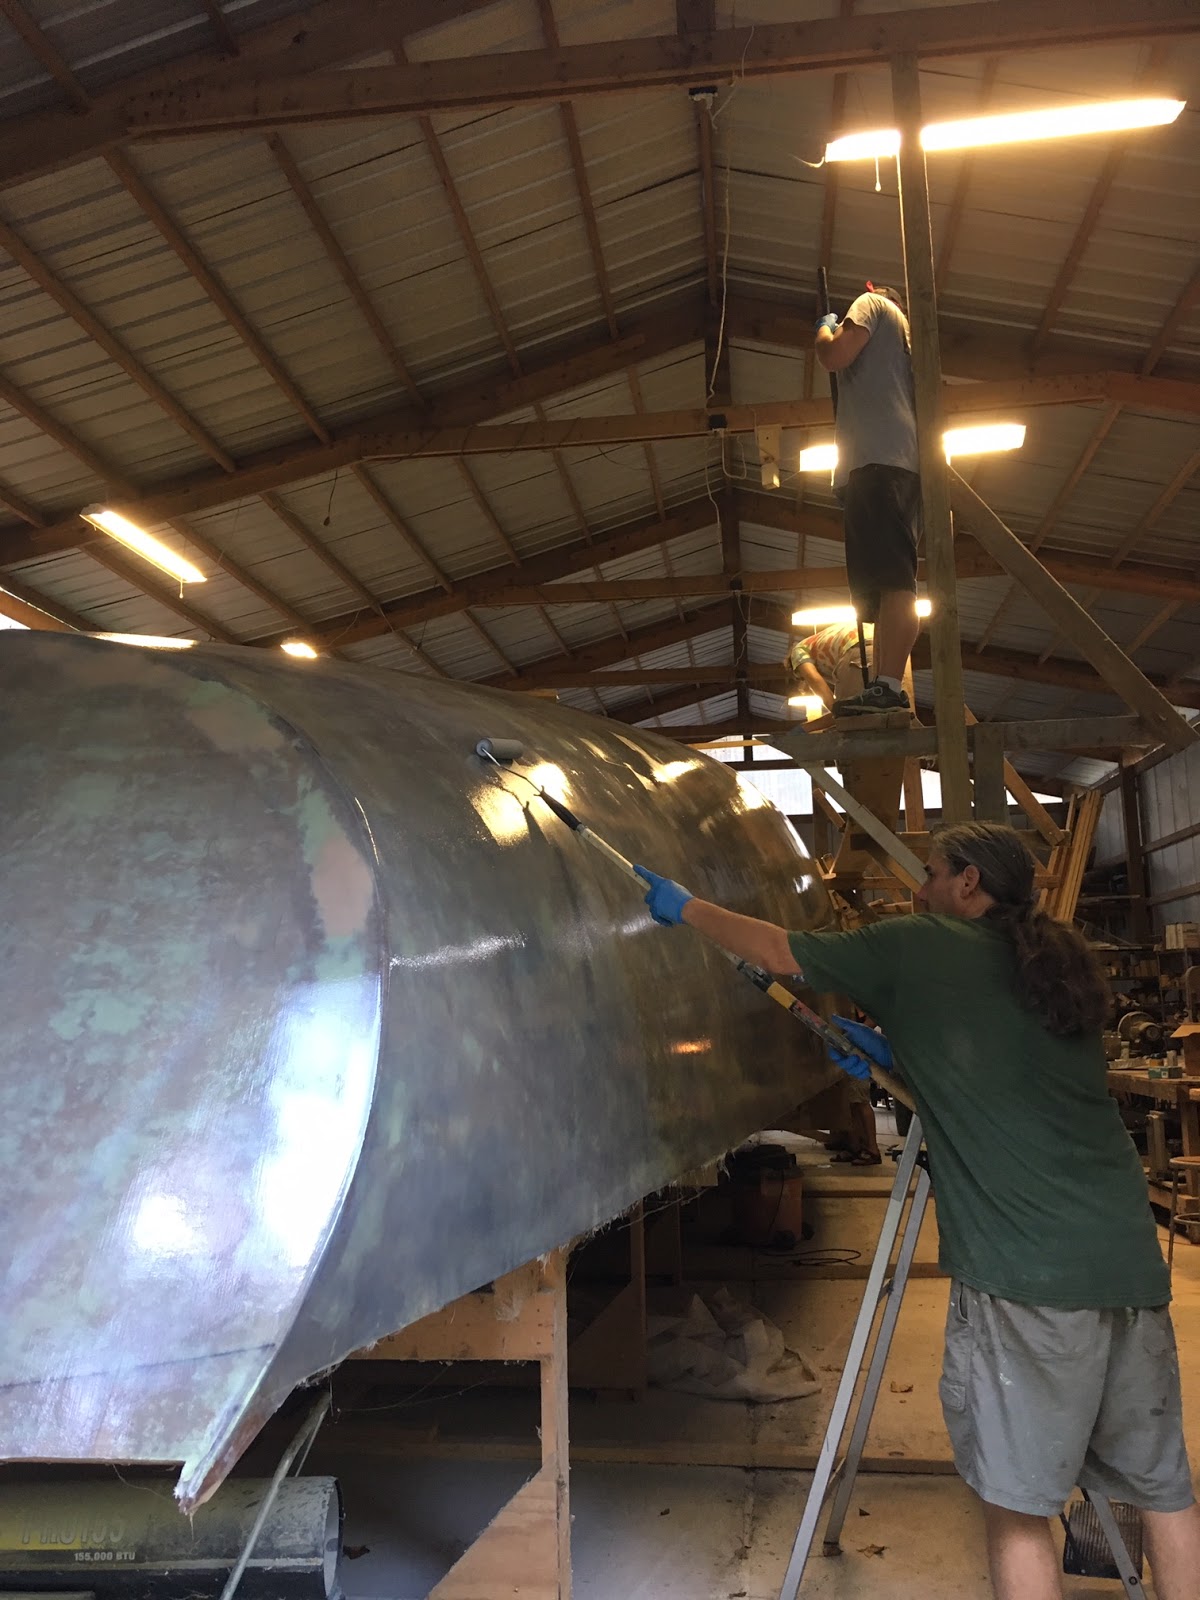
The work on Sunday was a glorious success.  We got one nice layer of epoxy on before lunch.  Everybody figured out their tasks.  After lunch, we got another layer on.  It when much faster on the next layer.  Temperatures remained mild for us in the low 80's F (~28 C). This gave us plenty of time to roll but it actually took a bit for the epoxy to set enough for a second layer.

Right before work begins.  Everything is sanded fair. 


Three layers of workers;  Ground, middle and top.  All working together to make sure the epoxy is coated evenly and each section is wetted into the next.  Tipper standing by to tip when a section is done.


Our fearless epoxy runner.  George makes sure no one is out of epoxy and that the dispenser cups make it back to the epoxy station.


I've already washed the blush off and started to sand again.  There are places that will need to be filled before the final layers of epoxy.   I've found some professional auto filler that has a long working life.  I'm going to skim coat large areas to take out the hull variations.  I'm using the belts sander with heavy grit and I'm keeping it moving over the surface to get an even sanding.  Dents and dimples easily show up as unsanded places like the image below.

This is one of those hull variations.  Someone  pressed their hand into the hull  and compressed the fiberglass mat.  It only showed up after some sanding.  I wonder who did that.  I've got their hand print so I'll figure it out.

Yep,  that's the culprit right there.  Unfortunately, that's my hand.   

Wednesday, December 19, 2018

November/December 2018 - May 2019

November/December/January/February/March/April/May 2019

I've combined that last two months of the year into one short page.  Basically October was stretched into November anyway.  The major elements from October are accomplished:

1) Finish rough sanding
               update:  Done
2) Fill dips, crevices and ripples and re-sand
               update:  Two or three minor issues that will take 15 minutes.
3) Add three more layers of glass around the bow for extra protection and sand/fill smooth
               update:  Only added two  more layers.  But this is finished except some minor sanding
4) Wash the hull down for the final coats of epoxy.
               update:  Nope, not there yet but only an hour or two away.

One of the things I most wanted to do this year was flip the boat right side up.  It's not going to happen this year.  It will happen this coming spring.

I hope everyone has a nice long break at the end of this year and wish everyone a great 2019.  I know it is going to a great boat building year and full of adventure.

And now November 2018 becomes January 2019.  But don't fret, work has been accomplished.  Slowly but surely.  It has been either cold or raining.  The glassed hull sweats like a cheating husband in the cross hairs.  Impossible to get much sanding accomplished.  Nevertheless, we are very close to being done.  A few more small dents and scratches to fill and we will be ready for rolling on more epoxy.  I plan on using the roll and tip method which should result in a finish that only need light sanding.  It's still a big job but not so big as what I've been through.  There will also need to be some filler added for a smooth transition between the keel stump and the hull.  Right now it's a sharp transition and I will want to make a radius here so that when I encapsulate the keel, the glass will make a smooth transition to the hull.

More filling and sanding... more filling and sanding and then...

Last bit of sanding before adding additional layers of epoxy and the barrier coats.  I found some soft spots where I fortified the bow.  Turns out that the top layer of extra glass did not get good adhesion in two places.  I'm not sure why.  Maybe those areas did not get cleaned properly or perhaps the glass was not properly set.  Anyway, the remaining glass won't pry up and I aggressively tried so I'll use thickened epoxy to smooth out these areas.  I'll prep by doing a thorough cleaning and light sanding.

What will be the top edge of the bow.  This area will probably be cut away for the bowsprit but I'll repair it as if it won't to make sure I have options.

A little disconcerting.  But I have made sure that these areas are the only ones affected by this issue.  
This was made out of a scrap piece of wood to create a radius fill around the keel stump below.

I added some fill around the keel stump.  I used the stylus above to create a smooth radius.

Fix for the delamination shown above.

Again, the fix for the delamination shown above.
Sanded around the keel stump.  Sanded the repairs shown above.  Sanded this. Sanded that.  I'm now finally convinced that I've sanded enough.  Time to roll on a few layers of epoxy and moisture barrier.  Planning to get a crew together in June to make this happen.  The final work on the hull before she is turned around.

A few words about sanding.  Hand sanding except in small hard to reach places is just not practical.  Especially marine epoxy.  I use three electric tools to sand.  The orbital sander, the palm sander and the belt sander.  Occasionally I might use an angle grinder with a sanding pad but this is more for shaping than sanding or at least removal of a large seam or some other difficult removal.  It is very difficult to produce smooth results with an angle grinder and easy to make a mistake that will require filling or worse.  The belt sander works well at removing seams in the fiberglass and working large areas that need a lot of material removal.  Most smaller areas can be dealt with with an orbital sander or palm sander.


Friday, October 12, 2018

October 2018

Ah, it's October and our high temperatures have finally dipped below 90 F (32 C).  Actually, the high today was a nice 75 F (24 C).  This is nice weather to work outside.

The glass on the transom sanded down very nicely especially around the edges where I was most worried.
I think it looks pretty good.  I'm ready to roll on a few more layers of epoxy on this part.

Now that I am no longer using the large angle grinder, I've rigged a vacuum system for the new belt sander.  This was a major increase in my comfort.  No more cover-alls, no more dusk mask and no more mess in the shop.  I was very pleased with the dust collection.  Very little dust is left behind and none gets into the air and on me.


I'm planning a big weekend next week to work on the boat.  I'd like to get the hull in shape to roll on the last layers of epoxy.  I have a few things planned to that end:

1) Finish rough sanding
               update:  Made good progress but not finished.
2) Fill dips, crevices and ripples and re-sand
               update:  Made good progress but not finished.
3) Add three more layers of glass around the bow for extra protection and sand/fill smooth
               update:  Only added two  more layers.  I have not filled and smoothed it yet.
4) Wash the hull down for the final coats of epoxy.
               update:  Nope, not there yet.

My goal is to minimize any sanding after I roll on the final layers of epoxy.  I know that there will be a bit of smoothing but I really don't want to have to perform any deep sanding or re-filling.  Wish me luck.


The dark patches are places that needed filling.  They were either  low places, places where the glass rippled a bit, or small voids.  You can see the Belt sander on the right with the vacuum hose going all the way over to the vacuum on the walk board on the left.  The vacuum is clamped to the walk board to keep it in its place.
This area was overworked when we applied the epoxy.  When you apply too much pressure or are too vigorous with the laminate roller, the glass obtains a ripple.  Not good, but fixed by lightly sanding and a bit of filling with thickened epoxy.
Sanding these fill areas was a lot of work and at one point I got the cord stuck in the belt sander.  See the  Tool Box for more information on that.

I wanted to reinforce the bow and increase the radius of the bow edge to increase dispersal of any impact the bow might encounter.  I added two layers of woven cloth tape.  One 6 inches (15.3 cm) wide and over that a 10 inch (25 cm) wide strip.  I used a small roller to apply epoxy along the bow where I wanted to place the glass.  I let it get a little tacky and then rolled on the strips of fiberglass.  The sticky surface helped hold the glass around the relatively narrow radius of the bow.  

Two layers of fiberglass 'tape' along the bow for a bit of extra protection and to increase the radius of the bow edge.  


I've added a few layers of mat glass with woven glass over the top in order to round out this rather flat area right before the fin keel.  It still has a chine but it looks a bit better.  I'm a bit puzzled why the keel (the flat part) extended so far forward.  
A straight on view.  


I like it when my pan released the cured epoxy clean and I can reuse it.

A light sand on the glass tape to remove the seam along the edge.  


I'll need to go over this lightly with a small orbital sander to prep for filling otherwise the epoxy won't have anything to adhere to.  This glass cuts through very easily (unlike the rest of the hull).  I found this out the hard way and I've already had to reapply a patch.
Okay, so I mentioned in the above image that I had to apply a patch where I sanded through the fiberglass cloth.   I have a fairly powerful orbital sander that I had originally bought for auto body work.  That was the sander I was using when I sanded through my glass.  I tried to use it again this morning to take down an area near the stern that I filled and was surprised at how aggressive it was then I realized that the sanding head was just spinning like a grinder and there was no orbital motion. No wonder I ripped through the glass tape on the bow.  I took the sanding head off and removed the bearing that lets the head free rotate and that bearing was frozen solid (Tool Box).  I've ordered a new bearing at around $15 and should have it by the end of next week.  

After a washing with soap and water and a little light sanding I mixed up some epoxy thickened with fiber dust collected from previous sanding efforts.  This makes a great, free, thickener that goes on very smooth and is hard as rock.  It won't sand as easily as most other thickeners but I can use the belt sander to get it in shape. I'll save the expensive thickener for the final faring.