Wednesday, December 19, 2018

November/December 2018 - May 2019

November/December/January/February/March/April/May 2019

I've combined that last two months of the year into one short page.  Basically October was stretched into November anyway.  The major elements from October are accomplished:

1) Finish rough sanding
               update:  Done
2) Fill dips, crevices and ripples and re-sand
               update:  Two or three minor issues that will take 15 minutes.
3) Add three more layers of glass around the bow for extra protection and sand/fill smooth
               update:  Only added two  more layers.  But this is finished except some minor sanding
4) Wash the hull down for the final coats of epoxy.
               update:  Nope, not there yet but only an hour or two away.

One of the things I most wanted to do this year was flip the boat right side up.  It's not going to happen this year.  It will happen this coming spring.

I hope everyone has a nice long break at the end of this year and wish everyone a great 2019.  I know it is going to a great boat building year and full of adventure.

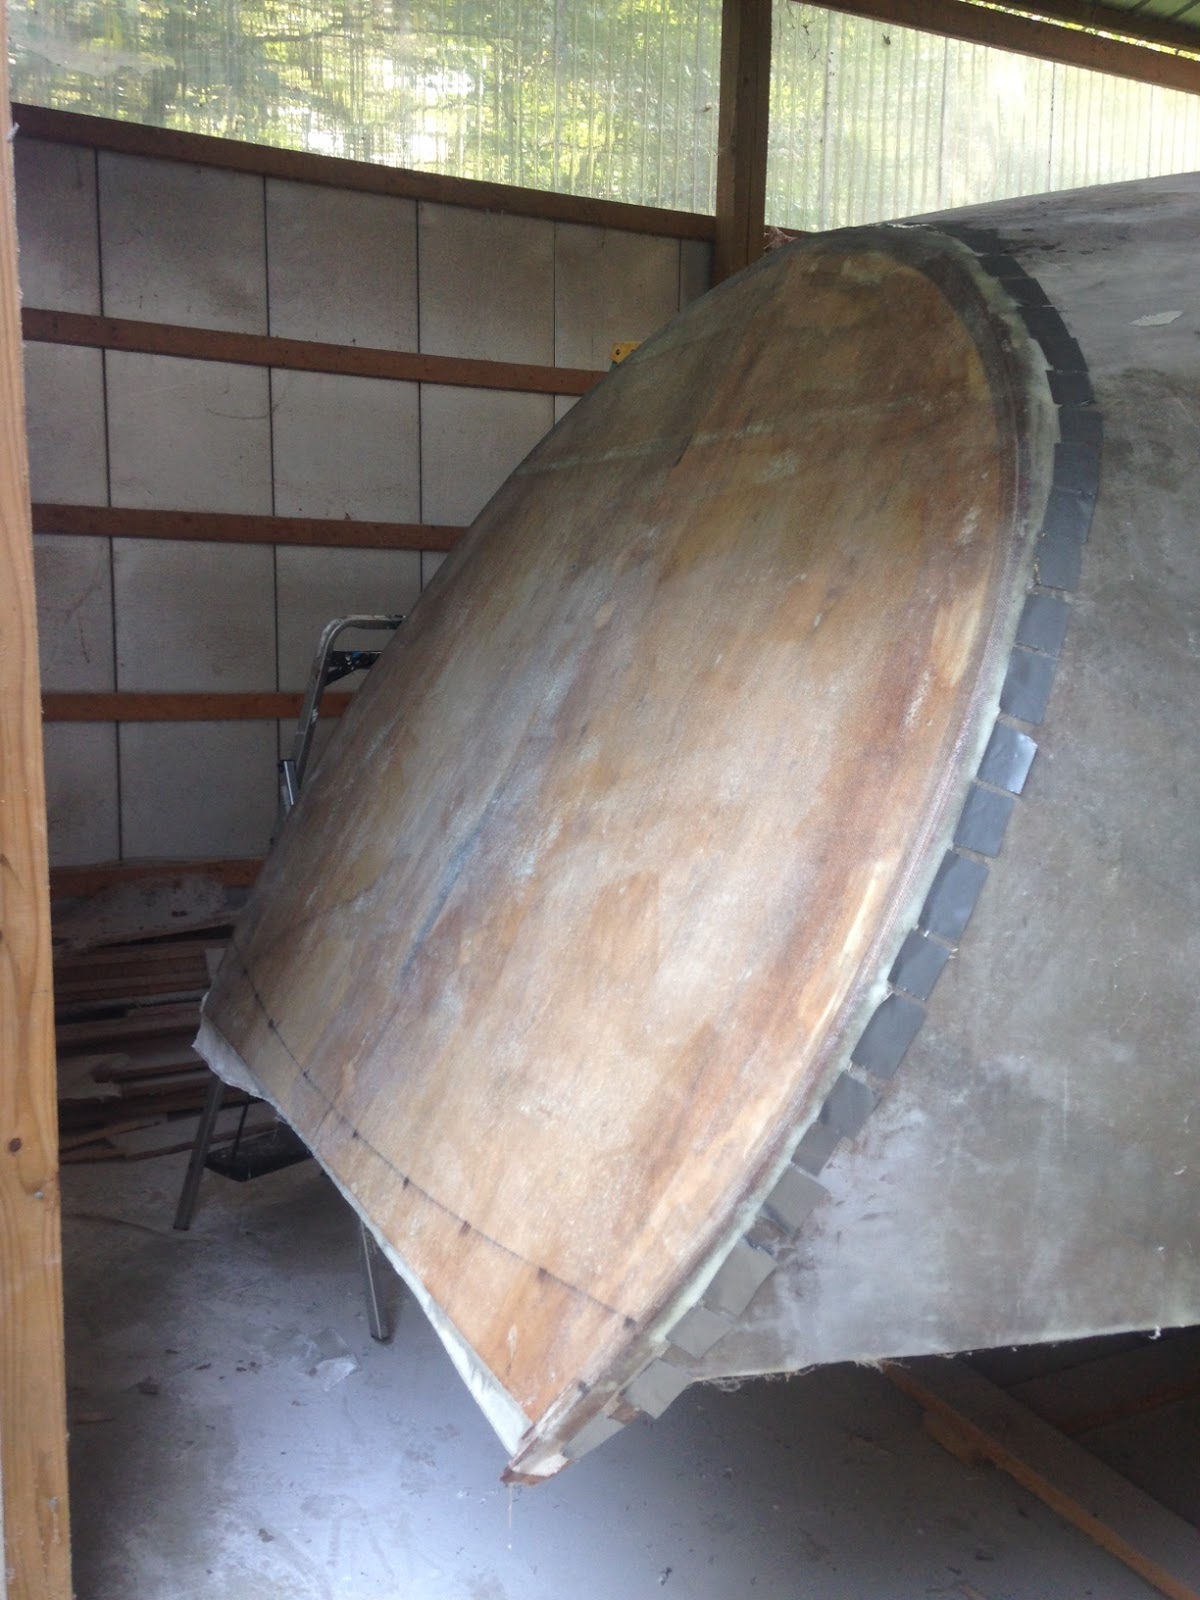
And now November 2018 becomes January 2019.  But don't fret, work has been accomplished.  Slowly but surely.  It has been either cold or raining.  The glassed hull sweats like a cheating husband in the cross hairs.  Impossible to get much sanding accomplished.  Nevertheless, we are very close to being done.  A few more small dents and scratches to fill and we will be ready for rolling on more epoxy.  I plan on using the roll and tip method which should result in a finish that only need light sanding.  It's still a big job but not so big as what I've been through.  There will also need to be some filler added for a smooth transition between the keel stump and the hull.  Right now it's a sharp transition and I will want to make a radius here so that when I encapsulate the keel, the glass will make a smooth transition to the hull.

More filling and sanding... more filling and sanding and then...

Last bit of sanding before adding additional layers of epoxy and the barrier coats.  I found some soft spots where I fortified the bow.  Turns out that the top layer of extra glass did not get good adhesion in two places.  I'm not sure why.  Maybe those areas did not get cleaned properly or perhaps the glass was not properly set.  Anyway, the remaining glass won't pry up and I aggressively tried so I'll use thickened epoxy to smooth out these areas.  I'll prep by doing a thorough cleaning and light sanding.

What will be the top edge of the bow.  This area will probably be cut away for the bowsprit but I'll repair it as if it won't to make sure I have options.

A little disconcerting.  But I have made sure that these areas are the only ones affected by this issue.  
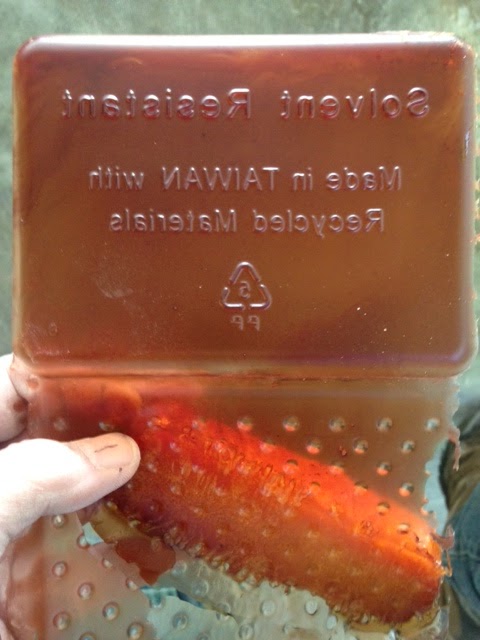
This was made out of a scrap piece of wood to create a radius fill around the keel stump below.

I added some fill around the keel stump.  I used the stylus above to create a smooth radius.

Fix for the delamination shown above.

Again, the fix for the delamination shown above.
Sanded around the keel stump.  Sanded the repairs shown above.  Sanded this. Sanded that.  I'm now finally convinced that I've sanded enough.  Time to roll on a few layers of epoxy and moisture barrier.  Planning to get a crew together in June to make this happen.  The final work on the hull before she is turned around.

A few words about sanding.  Hand sanding except in small hard to reach places is just not practical.  Especially marine epoxy.  I use three electric tools to sand.  The orbital sander, the palm sander and the belt sander.  Occasionally I might use an angle grinder with a sanding pad but this is more for shaping than sanding or at least removal of a large seam or some other difficult removal.  It is very difficult to produce smooth results with an angle grinder and easy to make a mistake that will require filling or worse.  The belt sander works well at removing seams in the fiberglass and working large areas that need a lot of material removal.  Most smaller areas can be dealt with with an orbital sander or palm sander.


Friday, October 12, 2018

October 2018

Ah, it's October and our high temperatures have finally dipped below 90 F (32 C).  Actually, the high today was a nice 75 F (24 C).  This is nice weather to work outside.

The glass on the transom sanded down very nicely especially around the edges where I was most worried.
I think it looks pretty good.  I'm ready to roll on a few more layers of epoxy on this part.

Now that I am no longer using the large angle grinder, I've rigged a vacuum system for the new belt sander.  This was a major increase in my comfort.  No more cover-alls, no more dusk mask and no more mess in the shop.  I was very pleased with the dust collection.  Very little dust is left behind and none gets into the air and on me.


I'm planning a big weekend next week to work on the boat.  I'd like to get the hull in shape to roll on the last layers of epoxy.  I have a few things planned to that end:

1) Finish rough sanding
               update:  Made good progress but not finished.
2) Fill dips, crevices and ripples and re-sand
               update:  Made good progress but not finished.
3) Add three more layers of glass around the bow for extra protection and sand/fill smooth
               update:  Only added two  more layers.  I have not filled and smoothed it yet.
4) Wash the hull down for the final coats of epoxy.
               update:  Nope, not there yet.

My goal is to minimize any sanding after I roll on the final layers of epoxy.  I know that there will be a bit of smoothing but I really don't want to have to perform any deep sanding or re-filling.  Wish me luck.


The dark patches are places that needed filling.  They were either  low places, places where the glass rippled a bit, or small voids.  You can see the Belt sander on the right with the vacuum hose going all the way over to the vacuum on the walk board on the left.  The vacuum is clamped to the walk board to keep it in its place.
This area was overworked when we applied the epoxy.  When you apply too much pressure or are too vigorous with the laminate roller, the glass obtains a ripple.  Not good, but fixed by lightly sanding and a bit of filling with thickened epoxy.
Sanding these fill areas was a lot of work and at one point I got the cord stuck in the belt sander.  See the  Tool Box for more information on that.

I wanted to reinforce the bow and increase the radius of the bow edge to increase dispersal of any impact the bow might encounter.  I added two layers of woven cloth tape.  One 6 inches (15.3 cm) wide and over that a 10 inch (25 cm) wide strip.  I used a small roller to apply epoxy along the bow where I wanted to place the glass.  I let it get a little tacky and then rolled on the strips of fiberglass.  The sticky surface helped hold the glass around the relatively narrow radius of the bow.  

Two layers of fiberglass 'tape' along the bow for a bit of extra protection and to increase the radius of the bow edge.  


I've added a few layers of mat glass with woven glass over the top in order to round out this rather flat area right before the fin keel.  It still has a chine but it looks a bit better.  I'm a bit puzzled why the keel (the flat part) extended so far forward.  
A straight on view.  


I like it when my pan released the cured epoxy clean and I can reuse it.

A light sand on the glass tape to remove the seam along the edge.  


I'll need to go over this lightly with a small orbital sander to prep for filling otherwise the epoxy won't have anything to adhere to.  This glass cuts through very easily (unlike the rest of the hull).  I found this out the hard way and I've already had to reapply a patch.
Okay, so I mentioned in the above image that I had to apply a patch where I sanded through the fiberglass cloth.   I have a fairly powerful orbital sander that I had originally bought for auto body work.  That was the sander I was using when I sanded through my glass.  I tried to use it again this morning to take down an area near the stern that I filled and was surprised at how aggressive it was then I realized that the sanding head was just spinning like a grinder and there was no orbital motion. No wonder I ripped through the glass tape on the bow.  I took the sanding head off and removed the bearing that lets the head free rotate and that bearing was frozen solid (Tool Box).  I've ordered a new bearing at around $15 and should have it by the end of next week.  

After a washing with soap and water and a little light sanding I mixed up some epoxy thickened with fiber dust collected from previous sanding efforts.  This makes a great, free, thickener that goes on very smooth and is hard as rock.  It won't sand as easily as most other thickeners but I can use the belt sander to get it in shape. I'll save the expensive thickener for the final faring.  

Friday, August 24, 2018

August/September 2018

August 14.

The rough sanding of the hull has commenced.  This is going to be a bigger job than I thought.  The idea is to rough sand the seams and high spots, fill in the low spots and ripples before applying the 3 or 4 covering coats of epoxy.  These covering coats will fill the weave and create a smooth finish.  They will also allow enough epoxy over the glass to perform a final sanding before paint application.

I  settled on a very powerful 6" angle grinder (Milwaukee) with a very rough grit (24) to take down the areas where there is overlap in the thick mat glass.  My belt sander is not up to this task but will be used to clean up and smooth out the work from the angle grinder.  This is a grinder I typically use for heavy steel grinding and concrete cutting.  I have a soft flexible sanding pad which keeps the pressure to a minimum.  It works well with some skill.  You can cause a lot of damage very quickly with one of these.  I did make a few mistakes (one which will require a little re-glassing in one small spot) before I got the technique down.

One of the tricks is to start the grinder/sander with the disk resting lightly on where you want sand at about a 25-30 degree angle to the work.  This will keep the sanding disk from digging into your work.  Apply light even pressure at an angle sufficient to bend the sanding disk and keep the grinder moving along the work.  Your only sanding with about 30% of the disk at any time.  If your angle gets shallower, you will loose control and dig the center nut into your work.  Too steep and the disk will cut into your work.  It is a careful balance to keep things smooth and requires skill.  Check the work often by running your hand over the job.  I was surprised to find that normal visual cues to how well the job is progressing are misleading when sanding the encapsulated glass.  The glass is translucent and the texture of the wood can be seen through it.  This makes an optical illusion of sorts that distorts depth perception making it difficult to judge the surface.  Look for sharp edges along the seam that show abrupt transitions but stop often to run your hand over the work.  Don't try to take the whole high spot/seam down with the angle grinder.  This tool is way too crude for that.  The belt sander will finish the work up nicely.

On the right is the 6 inch angle grinder.  It is a beast and you should use lots of caution when using this machine.  On the right is my new 4" belt sander.  It has a very powerful motor that will take what you can give it.  In the rear is the old belt sander that just isn't up to the task.  Both the angle grinder and the new belt sander are very heavy and require quite a bit of endurance to use.  Take breaks often.  When your tired is when you make the worst mistakes.

I'm using the belt sander to clean up the work performed by the angle grinder.  My old Bosch belt sander was just not up to the task.  I did a little research and purchased a Makita 4" 11 amp belt sander.  I've been very happy with it although it does weigh nearly 12 pounds.   The belt sander is more forgiving and requires less skill.  It is important to start the sander with the belt on the work with light even pressure.  Once the belt is up to speed you can increase pressure but keep the sanding belt parallel to the work.  The edge of the belt will dig in quickly.  I do modify where I place pressure on the belt in order to modify the surface I'm sanding just don't let an edge lift off the surface.  On a horizontal surface, you can let the weight of the machine do most of the work, on vertical surfaces you will tire quickly so take a lot of breaks.  The belt sander is far more forgiving than the angle grinder but less aggressive.  It is possible to do the entire job with the belt sander if you have a good one.  It will just take more time.  I highly recommend forgoing the angle grinder if you do not have sufficient experience with one.

The dust is a killer though and requires a high quality dust mask or respirator.  I've chosen the high quality dusk mask and it works well.  The dust will also cause some serious irritation to your skin.  I'm still working out my protective clothing.  I tried to wing it and suffered dearly.  I'm now going with coveralls that have elastic at the legs and arms.  I use baby powder on my neck and face before I work to keep the glass dust out of my pours.  Protective clothing is a must.  I think you become more sensitive to these fine particles over time and this can lead to dermatitis.

You can see one of the seams that was sanded running down the hull.  You also need to sand high spots on the rest of the hull with the belt sander.  This works pretty quickly.  If you look to the lower left corner of the picture you will see a place where the grinder dug through to the wood.  At first I thought this was due to a too stiff sanding pad.  Although the sanding pad was too stiff, the root cause of the sand through was bad penetration of the epoxy at that point of the seam.  There was another small area where this happened and I took note.  These are easily fixed so don't panic.  
Yes, this part of the build is miserable.  The temperature outside is 95 F (35 C) and your wearing long pants, long sleeve shirts and your mouth is covered by a thick dust mask.  The dust is itchy and the machines are heavy.

September 9,

I spent 7 hours sanding on the boat today.  I'm tired, hot and miserable but I got quite a bit done.  Most of the really rough sanding is complete (for this phase) and much of the belt work is done.  The new Makita belt sander has a nice dusk pick-up bag.  It probably picks up 1/3 to 1/2 of the dust it produces.   I started saving this dust to use later as a thickener for the epoxy.  I'm not sure how well this will work so I'll make a few tests.  This should be high quality filler since it is composed of fiberglass and cured epoxy.  So far I've managed to save a few pounds and expect a few pounds more.  I can only save what I sand with the belt sander, the grinder has no dust collection.

I'll need to purchase some more hardener and start filling in some of the low spots.

September 18,

West system hardener arrived yesterday.  This morning I prepared the transom.  I feathered the edges of the glass around the transom and hung the mat and woven cloth using all my new found skills.

The light is not good but you can see that the glass is dry laid on the transom.  I've overlapped the sides about 1.5 - 2 inches (5 cm).  I plan to tape the overlap around the edge of the transom.  That way, it will lay down nicely when I epoxy the edge.  Remember that I rounded the transom edge so this should help things lay nicely. 

I feather edged the cured glass around the corner of the transom.  The transom glass is taped around the curved edge so it  makes a smooth transition.

I've completed the application of the epoxy on the transom.  The tape worked fairly well.  I had to unstick about 1/3 of the tape and tighten the glass up a bit.  I wish I would have put tabs on the tape in anticipation of this.  When your gloves are slick with epoxy, pulling tape up is difficult.  That is a good lesson learned.  Also, at the bottom of the image you can see a curved black line along the transom,  This is the actual cut line for the transom.  I darkened the line with a black marker hoping that the line would be seen as the glass became transparent.  As a precaution, I also marked a few points on the woven cloth in case the original line was obscured.  It wasn't. 
I'll need to wash this section down and a few places I filled along the hull that needed it.  Working a small area like this you can really make sure that everything is smooth and your seams will need minimal sanding in the end.  I look forward to cleaning this section up.


Tuesday, July 3, 2018

July 2018

Well, it is July second.  Time to get back to it.  I've scheduled a big work day for Saturday July 7.  We will finally get the other side of the boat encapsulated.  Today, I had a few friends over to help dry lay the glass.  We decided to suit up for the procedure to avoid the big itch.

Left to right, Patrick, Nick and myself.  We are ready to roll in fiberglass.  The brush is just a last minute prop for the photo op.  We might decide to start fighting crime, but it'll have to wait for cooler weather, those suits are hot.

I must say, it's been nice getting help on the project.  Oh course the type of work being done now requires a large number of people.  That's one reason it takes awhile to get the big things done.  There is scheduling, gear to buy, food prep and lots of beer to buy.  We have a good crew coming Saturday, some from as far away as Birmingham.  I'll make sure someone is taking pictures.  I'm sure we'll have a great time and a few laughs.

We've finished both sides with the initial encapsulation.  We now have to wash her down and roll on a few more layers of epoxy to bury the weave.  Actually, I'll do a very rough sanding to bring the seams down even before we roll on more epoxy.

View from above.  A bit stretched using a panorama mode.

Add caption


The dogs enjoy a little romp while we work.

Glass mat and glass cloth ready for epoxy.  Smooth those wrinkles out first.

I overlaid the finished side with around 2 inches.  More would be over kill, less would make it difficult to keep the glass laid down around the edge. 

My crew assembled and getting ready to work.   That's me in the foreground, Nick, Laura and Pat.  

Nick working on the hardest part.  It's slippery up there and the glass does not lay well because it is really unsupported.

The sides rolled on very well.  That is Al Kuhn  rolling away.  

Keep the roller very wet to apply and roll till dry to take up excess.  Careful using too much force or you'll squeeze out the epoxy and leave a dent.


Just adding the finishing touches.  Making sure that the glass is laying down nicely on the previously finished side.  I'm using the laminate roller for this procedure.  We used it sparingly on this side and I think we had a better finish.  I'm not too worried about the excess over the bow laying down since I will grind most of it off anyway.  I'll then lay down about 4 inch strips along the bow edge to increase the radius there.


I think we are done for the day.


Must have refreshments