Monday, May 8, 2023

May 2023

 May 6,

I finished the plumbing runs to the shower sump and hooked it up to the holding tank. I finished installing the ceiling on the port side and installed the joists for the sole. I also worked out (mostly) the runs for the hot and cold water runs.

The shower sump is connected at last. The 1.5" PVC runs to both shower drains and the Vet berth lavatory drain. The grey water is pumped from the sump to thorough a 1" PVC pipe to the holding tanks. The fitting at the top of the page is a one-way valve or back flow preventer. I also added a ball valve right before the pipe enters the holding tank. I removed the cheap stainless pipe clamps and will replace those with high quality clamps.

May 10,

Running the PEX for hot and cold water. I sure do love how PEX is colored. 

A close up of the run from the galley sink where the hot water heater is to the port cabin lavatory (left, center), the starboard lavatory and shower (right, bottom), and the fee berth shower and lavatory (right, middle).

Under the galley counter is the propane powered hot water heater. I've used this brand of hot water heater in a cabin for 15 years. Very reliable and uses two "D" celled batteries for ignition. It is ventless and very efficient. I might have to put a heat shield under the counter above the exhaust but I doubt it. I'll check temperatures when I fist power it up. 3/4" PEX from the tank to the hot water heater. 3/4" PEX from the hot water heater to where the first branch is in the line. 1/2" PEX will come off the hot water heater to the galley sink.

Hot water heater connected with Tees heading toward galley sink. 1/5" drain is for galley sink as well.


We got the bead board cut into the Vee berth. No easy task.  The 3/4" boards need a good twist and curve to fit.

Removed, primed both sides, and reinstalled.

Finally hooked up the starboard head run to the holding tanks.  Notice the ball valve. Every connection to the holding tank has a ball valve. The tank is vented via a 3/8" braided clear hose. I will use a fuel tank vent through the hull near the scuppers. 


Port head run tying into the port holding tank with a sanitary tee to run to the galley sink. Venting of the tank is through the 3/8" nipple on top that will have a hose eventually.

The starboard head run branching to the starboard lavatory. The blocks of wood behind the 1..5" PVC supports the forced bend in the plumbing until the PVC glue is cured. Once removed, the PVC assumes a gentle bend. 

Port head run not quite finished.


May 28,

Working on finishing up the rough plumbing and adding all the tank vents so the cabinetry can be finished.


Installed the fresh water sending unit (upper right). Removing the access panel to the fresh water tank was really difficult so I added a tee handle. It is so easy now. I still have to add a ground wire to the sender unit so I'm not quite ready to bolt the access panel down yet. The port side is similar.

This is the fresh water vent. There is one on each side. The tape covers a 3/8" nipple where a hose will attached and vent the fresh water tanks under the settee. The blackwater tanks are vented through the hull near the scuppers to avoid odors. The port side is similar.

Fitting the cabinet front for the starboard berth. This is a trial fitting before it is glued up on a work bench.

It fit, so it is being glued up and screwed together from the rear. Yes, workbench is a mess. If you're working, there is not time for tidiness. 

Planing the bevel on the port cabin sole that will be under the berth. 

Measuring for the cut-outs for the plumbing and hull frame in the upper left corner.

A nice fit. I've also extended the supply lines to the port cabin lavatory  (right). 

Cabinet front tacked into place. Three nice sized drawers and three nice sized cabinets.

Friday, April 14, 2023

April, 2023

 April, 10

Construction on the interior continues. I am currently trying to get all the plumbing to the showers and vanities hooked up which means finishing the shower pans. The pans will be glassed smooth and painted white.  I'll extend the glass up and under the heads to make cleaning easy.

Looking down on the shower drain.  I have used a router to make a cut-out for a standard (US) shower drain and screen.  The corners of the shower are angled for easy clean-up. Bottom right is the door jamb on the hinge side. So the door will open out.

Jambs completed on the starboard shower. Right section is not epoxied yet. I still need to finish the door jambs for the walk through from the salon to the cabin area. That jamb will also support the narrow wall to the right of the shower. 

Plumbing run from (foreground) the port forward vanity to the port shower drain to a Tee that goes (right) to the shower sump and (left) on to the starboard shower. Sanitary Tees are being used throughout. 

A close up of the shower sump with rough connection. What if there is not enough room to get the pipe under the "H" beam? Water will not flow uphill. PVC can be heat shaped.


I heated the PVC pipe with a hot air gun and clamped a block on the top once the PVC got a little soft. This method retains most of the cross section area of the pipe while allowing it to fit under the steel "H" beam without a dip in the pipe that will collect debris over time. 

April, 23
I have temporarily placed boards that define the cabinetry associated with the starboard berth. Since the floor falls aft, the bottom horizontal board is actually tapered so the cabinets and berth will be level. The drain for the starboard shower is dry installed (needs to be glued) to make sure everything fits correctly and gravity feeds to the shower sump pump. 
This is the starboard cabin. Left is the berth with cabinetry below. There will be three drawers across the top with three cabinets below each drawer. The drawers will be deep. The two cabinets on the right will have a common shelf in the middle. 

April 29,30
Half lap joints work very well for the cabinet fronts. I used a router for the pockets and a dado blade on the radial arm saw for the half lap. I curved the corners with an end sander so I don't have to square the pockets with a chisel. Saves a lot of work and it doesn't have to be perfect because you can't see that side.

This is the back side of the cabinet front lightly set together to check tolerances and fit. I'll glue all this up and screw it together with 1/2" stainless screws from the back.


Tuesday, March 7, 2023

March 2023

 March 5,

More work on the interior cabinetry. I've worked out cabinet doors a bit more.  I still need to experiment with the basket weave panels.  More on that later.

The countertop, settees, and crew berths are all constructed of Meranti plywood.  All vertical pieces are 3/8" (9mm) and all horizontal (seat and berth floor) are 1/2" (12mm). All joints for the plywood are build on white oak frames. Never screw plywood directly to plywood end grain. Almost all of the oak frames are  roughly 1"x1" (some are 1"x2") and are made from the unused waste from fabricating the longitudinals and other framing structures. I don't throw any wood away. 

The opening to the left of the stair will be the oilskin locker.  Those stairs will actually be a bit steeper allowing passage between them and the locker to access the chart table beyond.  


Fitting a bulkhead that will become a recessed lavatory for the starboard side head. 

The starboard side settee roughed together against the fitted bulkhead from above.  You can see a small space between the ceiling and the back of the bulkhead.  Four foot wide plywood was not quite wide enough.  Turns out that space will allow the removal of a few of the ceiling (wall) boards to access electrical runs. It's also back in a cabinet and I'll install a fitted panel to hide the gap.

March 14, 
I'm technically off work this week so I plan on making some progress on the boat.  Saying that, I'm actually at work today covering some important meetings that I have to attend.  A good time for updates.

The crew berth gets the access cut out and trim fitted.  The trim is just rough fit and needs some tweaking and a lot of sanding but I think it will look great eventually. The vented loop will have an easy access panel over it for aesthetics. 


Sometime in March,

I have moved up the starboard side and I'm working on the starboard head and cabin floor under the cabinetry just like the salon. Everything is in place and it is time to glass the shower stall floors and get all the plumbing in for the vanities and showers.  

Tuesday, February 14, 2023

February 2023

 February 12,

Starting on some cabinetry. 

Avoiding sharp corners while providing backing for joints.

Fitting the first cabinet face.  This one will fit the curvature of the hull and provide a base for the Settee and galley.
February 19,

We made a lot of progress this weekend. The cabinetry is going in fairly quickly.  I've decided to just use screws everywhere so that it can be removed to reach areas for maintenance. That actually makes putting everything together much faster. All vertical cabinet panels are 3/8" Meranti plywood while the horizontal panels are all 1/2" Meranti plywood.  I've got so much scrap white oak lying around, some in 15' lengths from cutting the longitudinals, that I am using for backing for joints and supports for the cabinetry. 
This is the settee being built.  There will be plenty of storage.

In the foreground is the galley sink cabinet and in the background you can see the settee and a crew berth behind the settee.  The crew berth will have a cutout in the middle to make it easier to craw in and out but still have a barrier to keep the crew member in the berth in rough weather. The galley sink cabinet will have a handhold along the walkway that converts to a backsplash as it round the back corner. The settee will have a trim piece along the front to hold the cushions in place and lockers under the cushions to access the storage space.


Tuesday, January 10, 2023

January 2023

 Jan 8.

Ceiling primed and installed with floor joists laid in place.  I have the boat close enough to level that I can use a water level if I'm careful but mostly I'm just using it as a straight edge. 

Jan 18,

Wood for building boats is getting hard to come by especially away from the coast.  Marine grade plywood is skyrocketing in price and getting scares. I'm glad I have most of what I need.  I will need a few more sheets of 20 mm and 12 mm plywood.  I have a source in Gulf Breeze, Meridith Lumber.  No exactly what I want but it might do.  I also found Meranti, which is what I've been using, in Ohio. Marine Plywood by Homestead.  An 8 hour drive one way but it's cheaper than Noah Marine right now and the shipping should be cheaper as well. I'll check that as an option.

Jan 22,

Worked on plumbing this weekend and getting the galley prepared for cabinetry.  I had to figure out how to mate the fitting for the pressure pump to the PEX that I'm using for the fresh water system.  At first I was going to go with a threaded 1/2" fitting to a 3/4" PEX fitting but our local stores did not carry that fitting and was going to have to order it.  I thought a little harder and decided to go with PEX type A 3/4" pipe and stretch it over the barbed fitting that came with the pump.  A stretching tool was going to set me back $150 so I put some oak on the lathe and made my own.  I made one mistake in that the clamping ring no longer fit over the barb and I could not get the fitting back out once I hammered it in.  I was able to gently persuade the clamping ring over the barb and PEX with a block of wood and light blows with a hammer.  That is where the slight marring of the outside came from.  I've got one more of these to make and it will be much easier the second time as with most things.  By the way, this is PEX A and can be stretched, never attempt to stretch PEX B or C. 

The black fitting is the combination barb and threaded fitting that came with the pressure pump.  If using the threaded part, you would cut off the barb.  You can see the barb causing a bit of swelling just below the clamping ring. You want a bit of room on either side of the clamp. You definitely do not want the clamp directly on the barb or too close to the end. The wooden piece to the left is what I used to stretch the PEX to accept the barb.

The tanks plumbed to the pump.  1/2" pipe comes out of the tanks and then comes together with 3/4" PEX.  There are individual valves for each tank underneath.  A bit of a stretch, but the tanks can be turned off individually if necessary.  Unfortunately, any repair work to this part of the fresh water system is going to be difficult. All of it is very low pressure, so hopefully it will last for the boats lifetime.

Working on the vented loop for the below-the-waterline discharge.  Missing is the final leg between the vented loop and the through hull fitting.  The through hull has not yet been installed but can be seen sitting  off to the left.  Above the ceiling (painted white), you can see where I've started to feed electrical wires to the various fixtures including the pump shown. 

The 3/4" PVC pipe show in the center is the grey water run that will go to the shower sump pump.  There is one small section where the grey water will be pumped up, the rest should gravity feed to the tanks.  I don't want grey water draining back to the sump or sitting in pipes.

Heat gun set up to bend schedule 40 PVC pipe.  Note the bent piece of metal at the other end to help hold in the heat a bit. There is a 1/4" gap between the end of the pipe and the piece of bent metal.

The other end of the heating process.  One problem I've encountered is that the heat concentrates on the outer edges and it is hard to get a bend in the middle of the pipe.  I think I need to heat the outside of the pipe a bit to get a smooth bend.  That's what I did previously.  It wasn't really necessary for this installation.

First through-hull with 90 degree pipe.  I've cut down the threads on the threaded fitting to fit my hull thickness.

Another view.

First hole below the waterline.  I plan to saturate the exposed wood in the hole with West epoxy.  I'll then use thickened West G-flex epoxy to bed the fitting in before the wetted out wood has cured. The G-flex is more flexible and more suitable for bedding fittings.  


Monday, December 5, 2022

December 2022

As I mentioned earlier, all waste water plumbing will be schedule 40 PVC and all fresh water will be PEX.  PEX is chosen for its flexibility and durability and the PVS is chosen for its durability and price.  I think PVC is generally not used in pleasure boats because it comes in stiff straight runs and not well suited for the curved surfaces of a boat.  It also requires glueing together (actually chemically welding) and can be a bit of a pain to cut correctly.  Or at least I thing these are the reasons builders don't use it on pleasure boats.  It is much much cheaper than sanitary hose, lighter and I suspect PVC is more impervious to odor than conventional sanitary hose.  I've worked with PVC quite a bit on residential projects.  I've also learned that it can be bent to pretty tight curves given a bit of finesse. The trick is heating the pipe to the right temperature and not trying to bend it too much in a single heating cycle.  I found this out when I built a steam chamber out of 4" PVC pipe back when I built my first canoe.  The steam chamber worked great but it started to sag in the middle. I thought at the time that knowledge would come in handy. Sure enough, I was able to bend 1.5" PVC to the curvature of the side of the hull (see pictures below).  Cuts still take some trial and error in the tight spaces of the hull of a boat.  Dry fit the pieces together and don't glue up too much at one time.  Remember that when you add glue to the joints being joined, they slip a bit tighter that they do when you are dry fitting them.  As for transitioning to marine fittings, such as pumps and through-hulls, a 1.5 - 1.25 rubber transition bought at your local hardware store works perfectly.  These rubber transitions are tough and made to last forever.  They also add some vibration isolation and flexibility when attached to pumps and rigid fittings.  All tank fittings are designed to work with threaded PVC fittings or glue in PVC fittings son no weird transitions needed.  

 Dec 4,

It's almost time to say good-by to the holding tanks.  Soon they will be covered by the sole.  I still need to add a vent to each tank.  I have the fitting but have not decided the best way to proceed. 

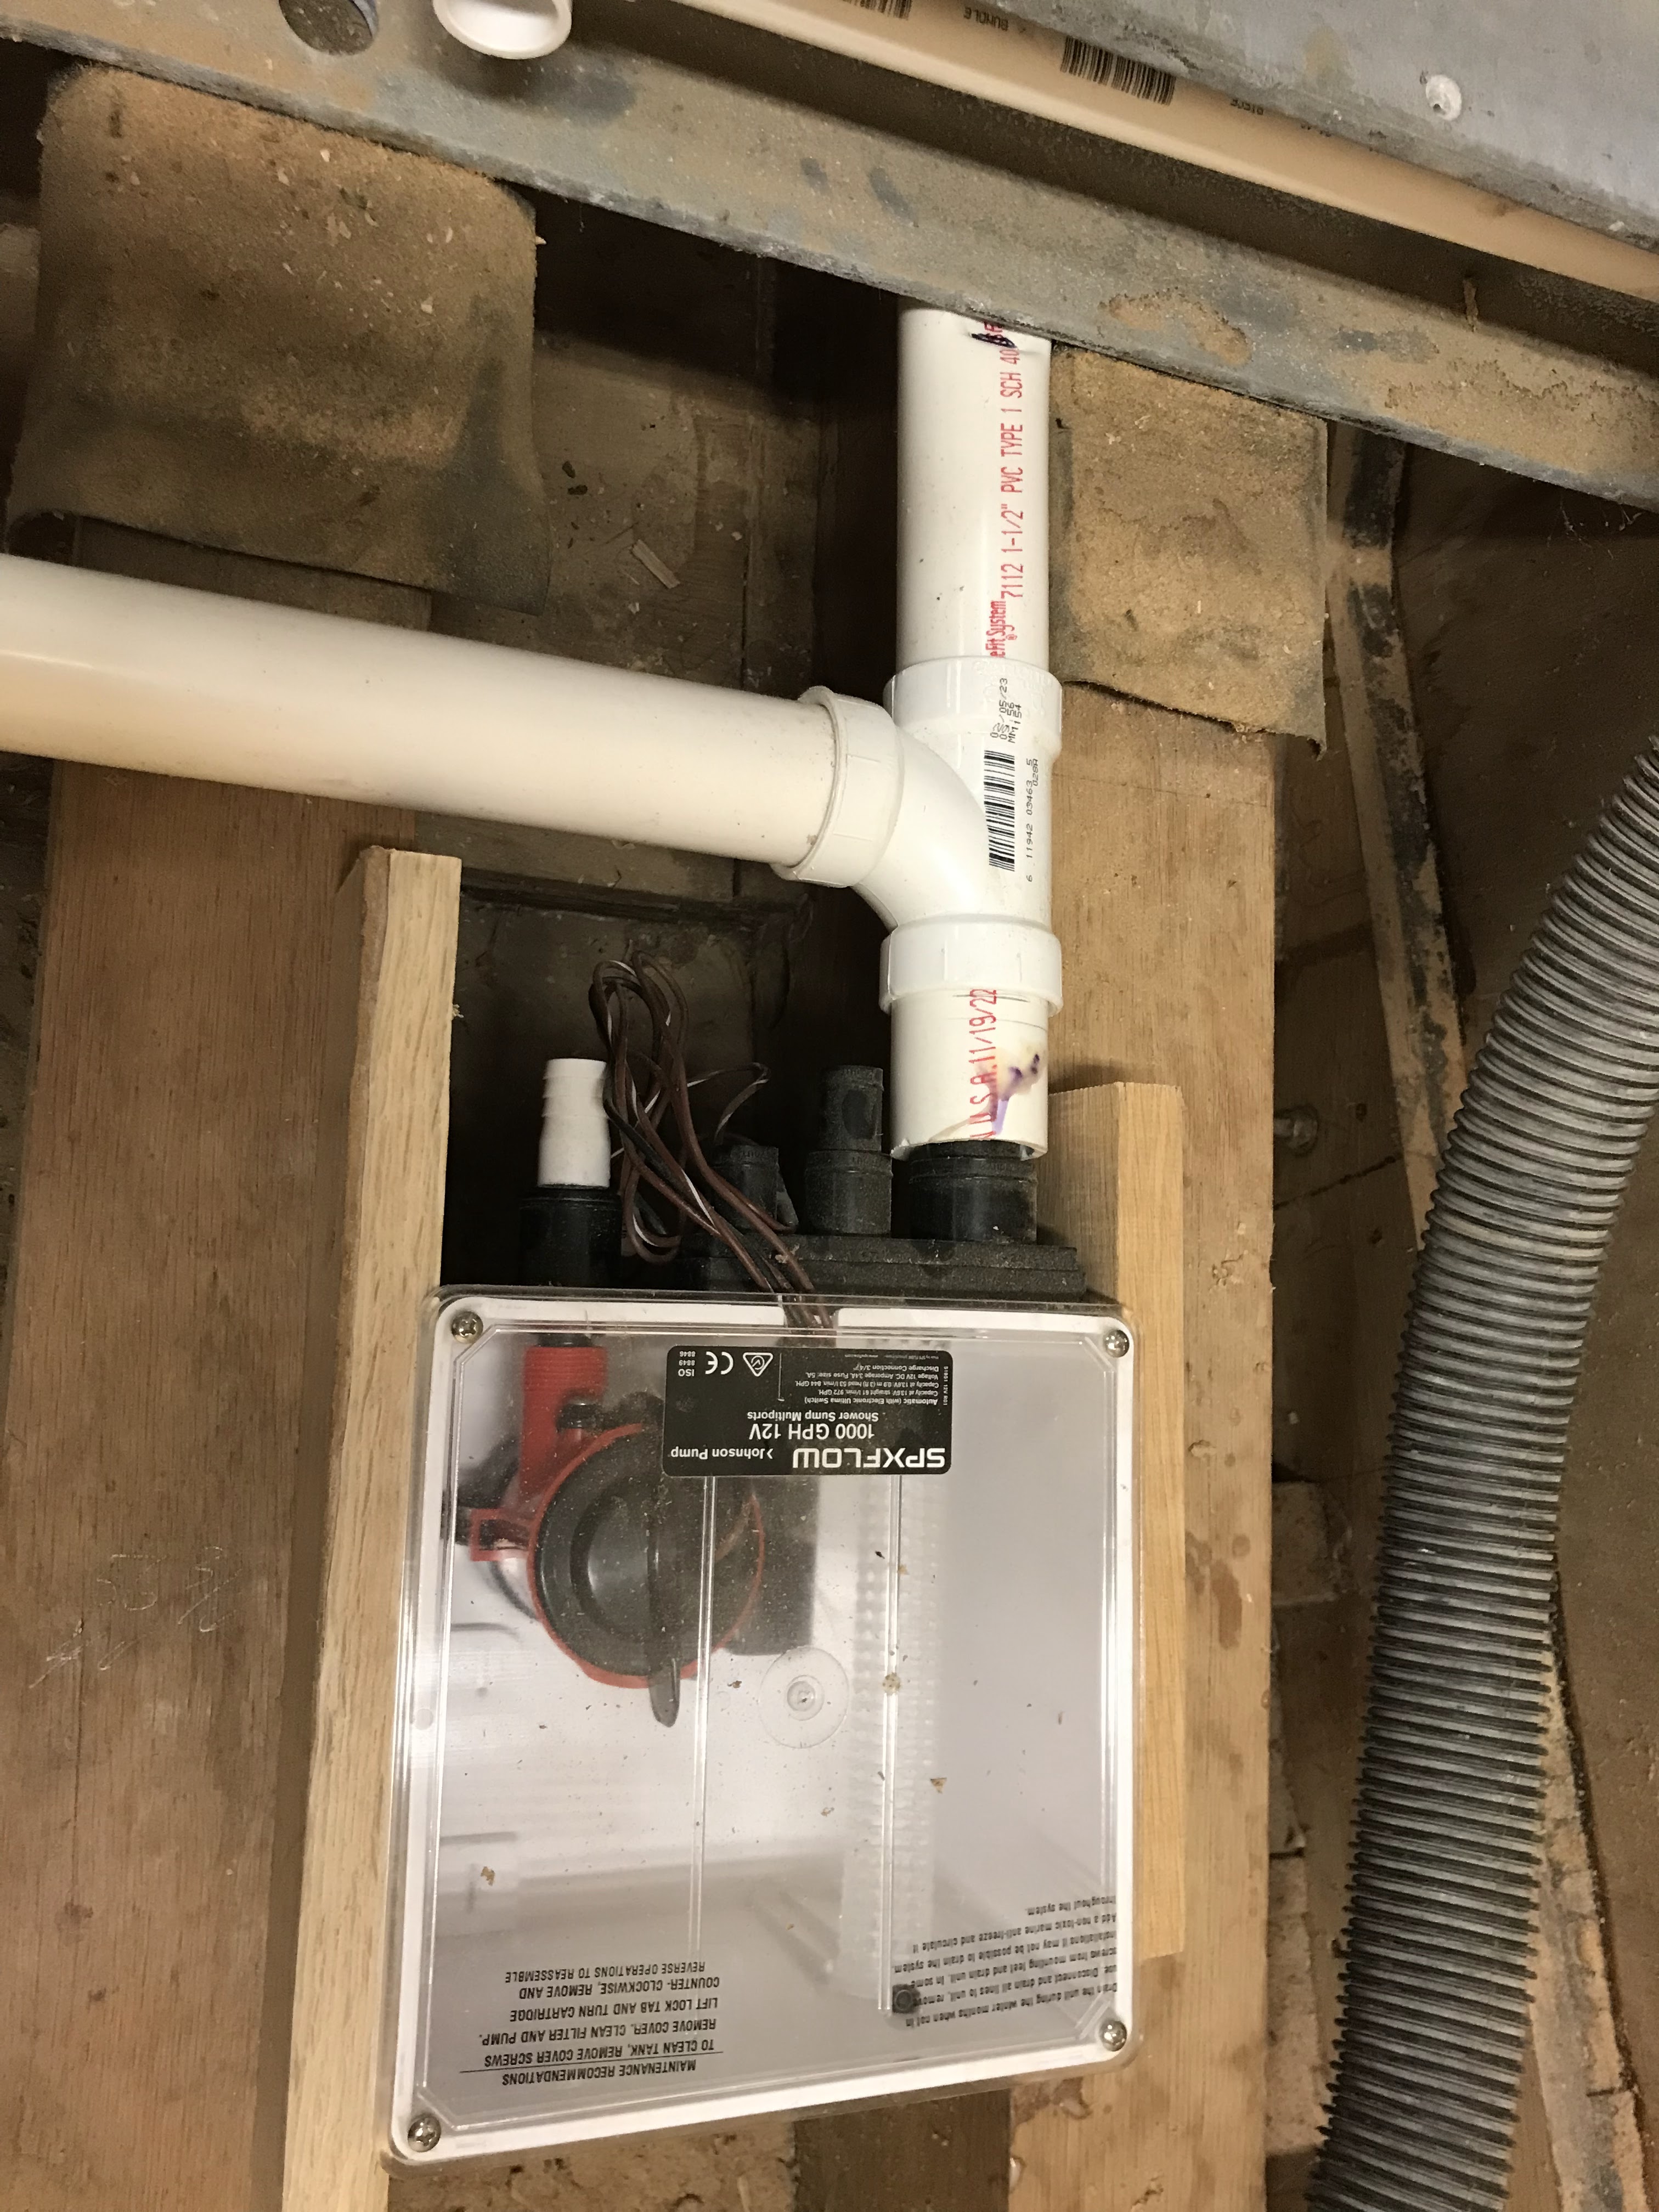
Working through the rough plumbing.  The pump-out is a 1.5" PVC schedule 40 pipe starting at the bottom of the tank connector and drawing straight up and around the starboard tank.  It then encounters a "Y" where the straight part continues to the pump-out port on deck and the branching part goes to the waste pump and up through a vented loop and back down to a through hull fitting.  The vented loop portion and through hull fitting are not shown.

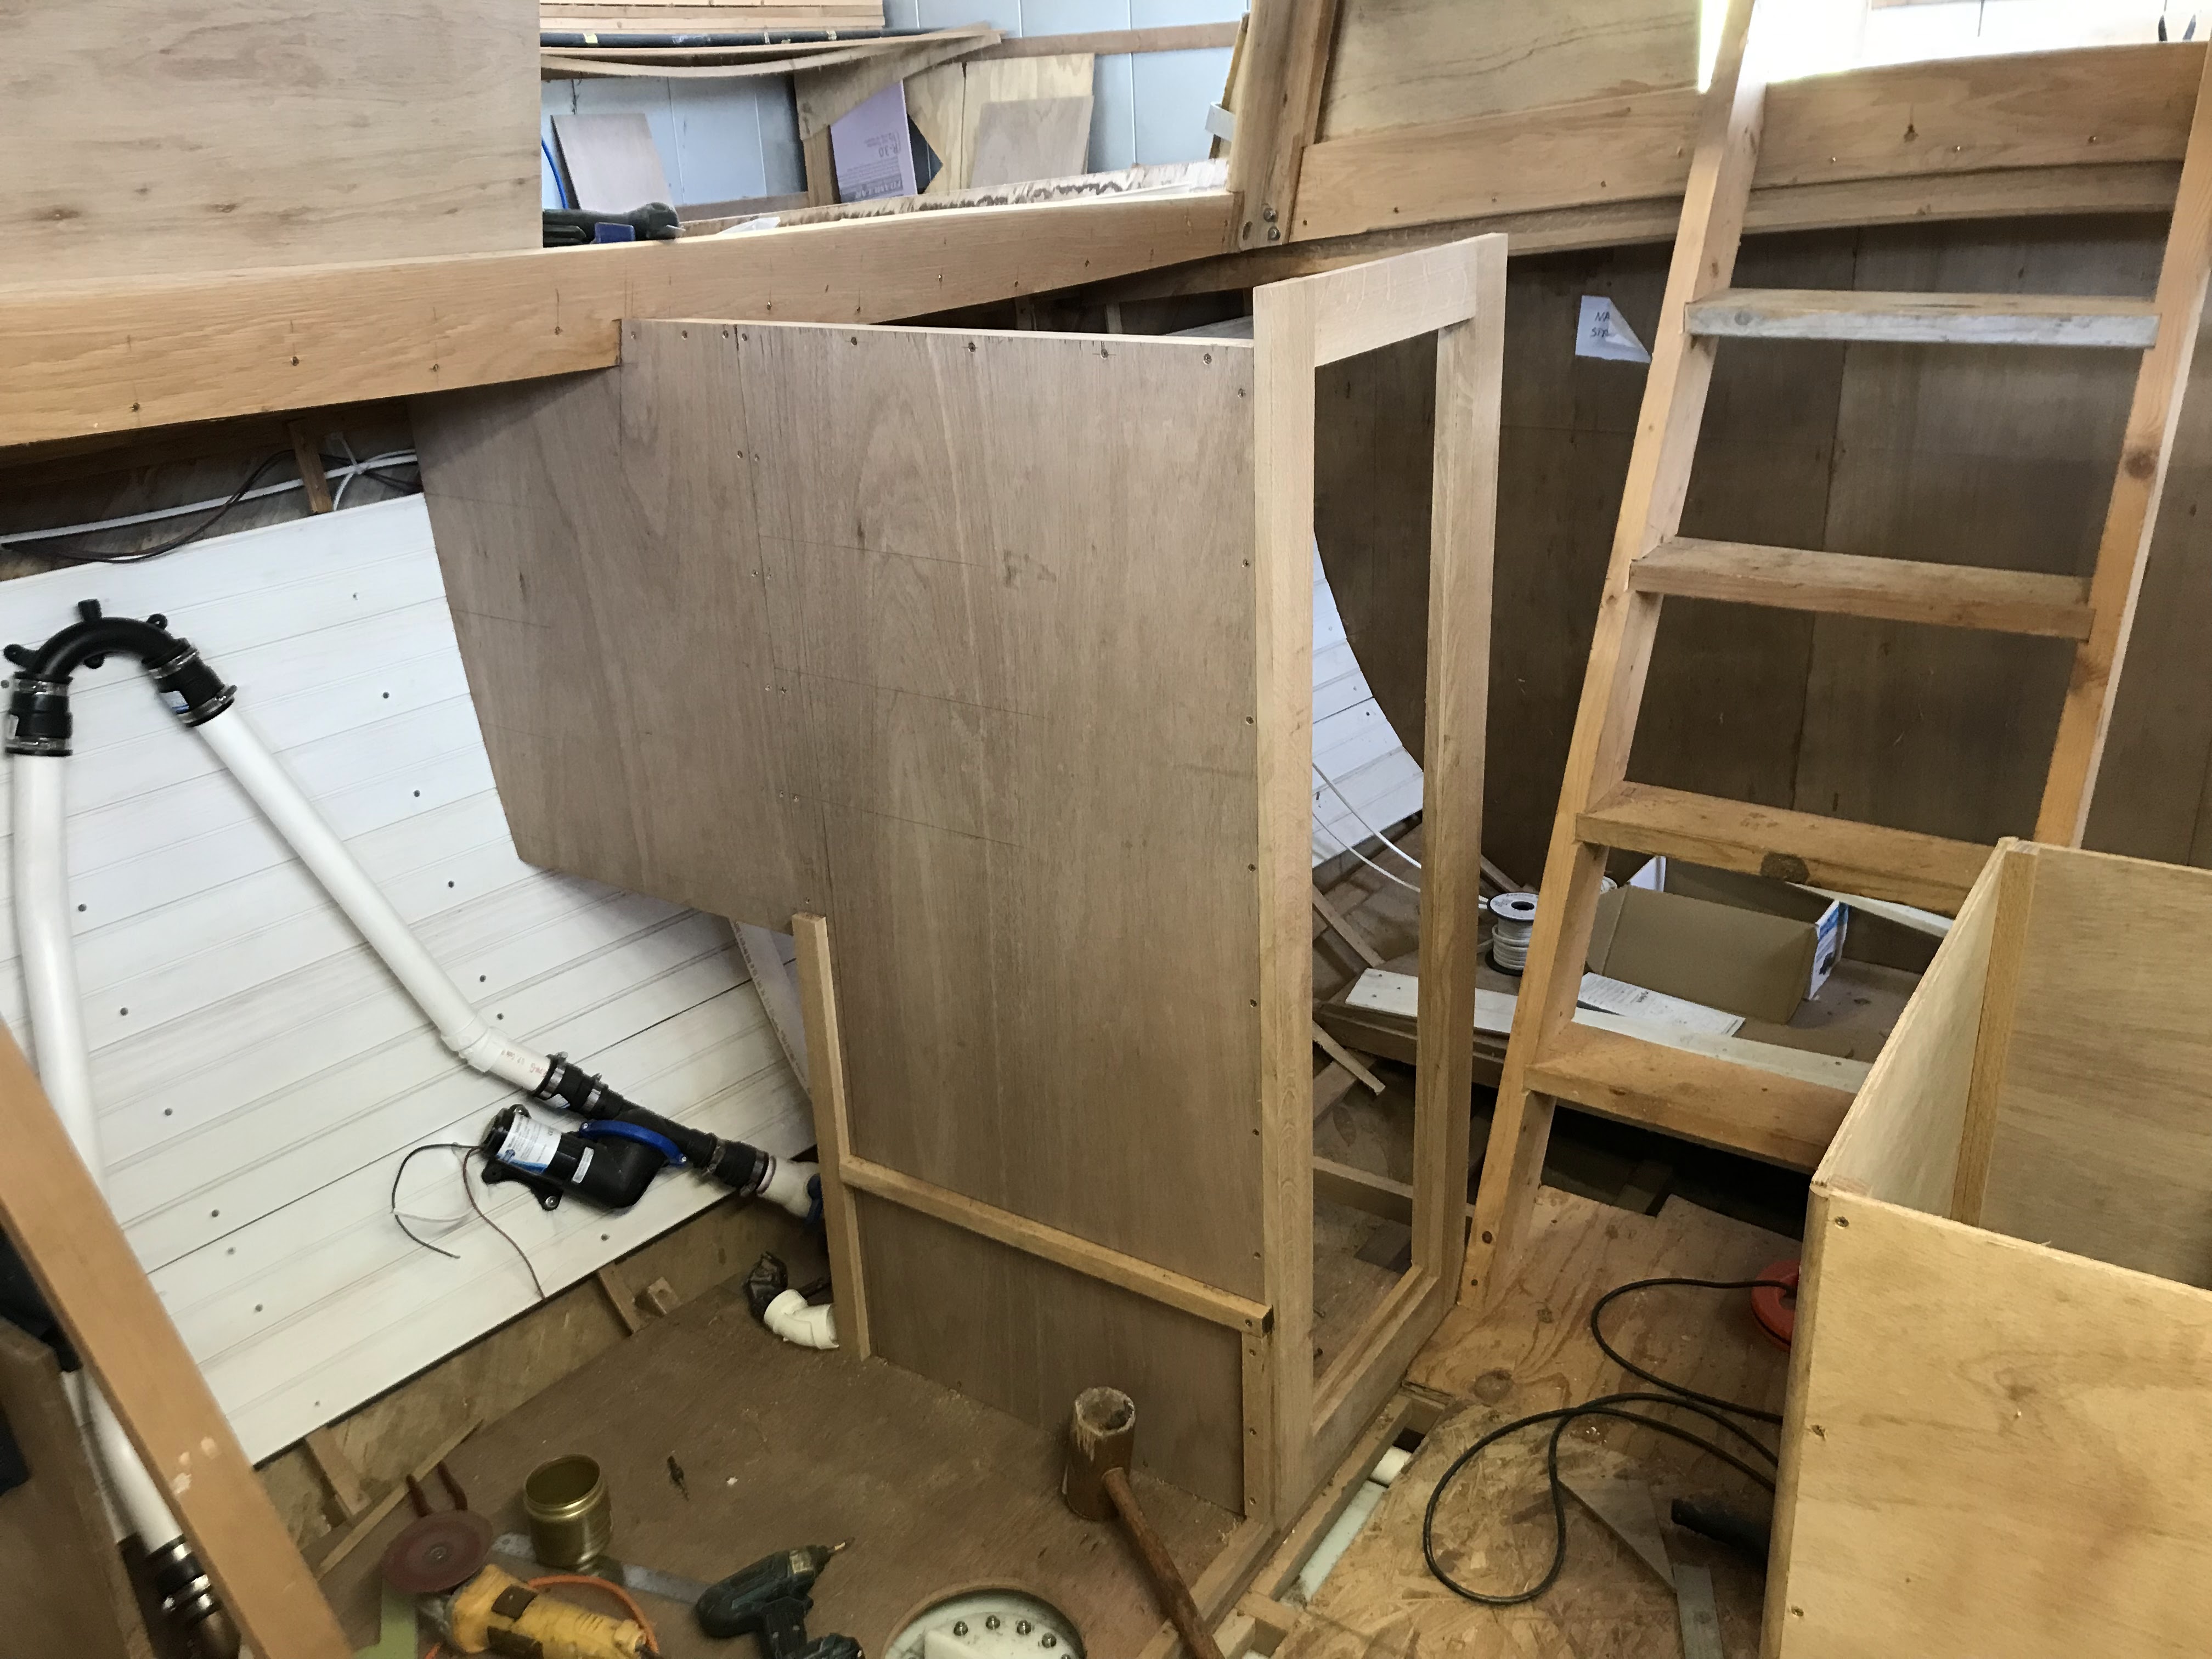
Cut our some flooring that will go under the cabinets in the galley.  You can see the "U" galley if you ignore the 12"x24" temporary piece that is in place in the middle so I can stand and pretend to cook. Plumbing access holes are not yet cut out of the sole. 

Preparing for laying down the fresh water tanks. These are aluminum "U" panels that wrap around the floor boards with 30# asphalt impregnated felt in between.  The tanks will lay on these. No condensation issues here.  

Tanks in!

I don't need any super expensive sanitation hose.  Schedule 40 PVC is superior and cheap.  Oh, and you can bend it after heating with a heat gun.  

Yes, the heat gun worked very well for the above bend.  The technique that I used for this bend is that I held the heat gun so that it blew hot air into one end of the pipe.  This heated the pipe evenly around the circumference of the pipe but tended to over heat the pipe on one end as apposed to the other.  For short lengths this is not a problem.  For intermediate lengths, you might want to heat both ends, one after the other.  The pipe cools very slowly once heated so cooling is not a problem.  For this bend, heating more on  one side than the other actually worked in my favor.  For long runs and gentle curves, I'll try heating the pipe externally and slowly working the bend I need into the pipe.

The tube to the deck goes to the deck pump-out.  The "Y" goes to the over-board pump-out (pump shown) via a ball valve so I can replace that pump without stinking up the entire cabin. There will be a loop up under the deck before the plumbing goes back down below the waterline to a through-hull.  I need to get the ceiling in first because all of this will mount to the ceiling under the settee.