Monday, July 8, 2024

 July 2024,

July 8,

July fourth holiday weekend here in the states proved to be a productive day working on the boat.  I finally purchased that little bit of southern yellow pine to finish up the ceilings (walls actually). With that, I have been finishing up the sole for the front half of the boat. Interior progress has move along quickly this year. Happy fourth to all you yanks out there.

Some of the new flooring laid out before installation. I'll remove it all and add some epoxy to hold everything in place. The glue is almost not even necessary since everything fits together pretty tight but I figure it will cut down on the squeaky floors.

Some more loosely in place. I number all the pieces in pencil and take a photograph so I know how everything is put together when it is time for gluing. 

I got the much of the sole completed all the way to the "Vee" berth with two more hatches. I'm planning one more hatch on this half of the boat. The salon and galley will have a few (but not nearly as many) as well for access to the keel bolts and plumbing. On this section, I have a hatch to access every space between bulkheads, all keel bolts, all electrical runs, and most plumbing. 

The sole is taking shape. I still need to finish off some edges on the right and behind the shower on the left.
July 21,
I've finished cutting out and dry fitting the remaining sole on the front half of the boat. I'm actually missing one short piece next to a hatch. I need to buy some more flooring to finish out the back half anyway although I was hoping to finish this part with what I had. Below are some images of the finish work around corners and into the ceiling (walls). 


Fitting the "Vee" berth. I spent about half a day making a pattern for this piece. The interface with the ceiling (white wall) is beveled to make a clean fit. This fit amazingly well. Also, the pattern worked for the  other side with only a mild modification. This boat is very symmetrical.


Both pieces cut out. Both have been fitted but not together. It would be very difficult to get them back out again if they were both fitted together. 

Access hatches cut out. More on this later. 


Wednesday, June 5, 2024

June 2024

 June 2.

I have worked out how all the doors and walls come together at the forward head. Most of the casings are built and put in place temporarily. I was all kinda like a jig saw puzzle. Things had to be put together in a specific order to get everything locked together. I am very pleased with the results. 

Looking forward. To the left will be a door to the shower and beyond, another door, to the "Vee" berth. To the right, will be a door to the "Vee" berth. 

A close up at the casing and trim.


Final layer of epoxy on the shower pan.
June 16,

I turned my attention back to the oil skin locker near the aft entrance. The top of the locker will have storage held in place by a cargo net attached to sides with hand holds. I had my wife test the hand holds so that she was comfortable. We have vastly different size hands so coming up with something that is comfortable for both of us required a bit of thought. All the hand holds are 6" long and 1.25" wide. The will be 1.25" from the radiused edge. This seams to work for most adult hand sizes. I used a hole saw to cut the rounded ends of the hand holds and used a jig saw to connect the two holes to make elongated slots. The jig saw cuts are cleaned up with a chisel and then block sanded. I also wrapped 80 grit sandpaper around a metal pipe to clean up the hole saw cuts. A router is used to make the radius around the slot and on the top of the hand hold. I spent quite a bit of time cleaning these up before the router work. The router bit bearing is going to follow the wood and any bumps will be translated to the radius.

I have rough cut the hand holds using a hole saw for the ends and then using a jigsaw for the sides. 


A block with 80 grit sand paper is used to clean up the cuts. A router with a bearing is used to round off the edges. If the cuts are not perfectly clean and straight, the bearing will transmit imperfections to the round off. 

Ah, nice and clean.


Tuesday, May 7, 2024

May 2024

 May 5

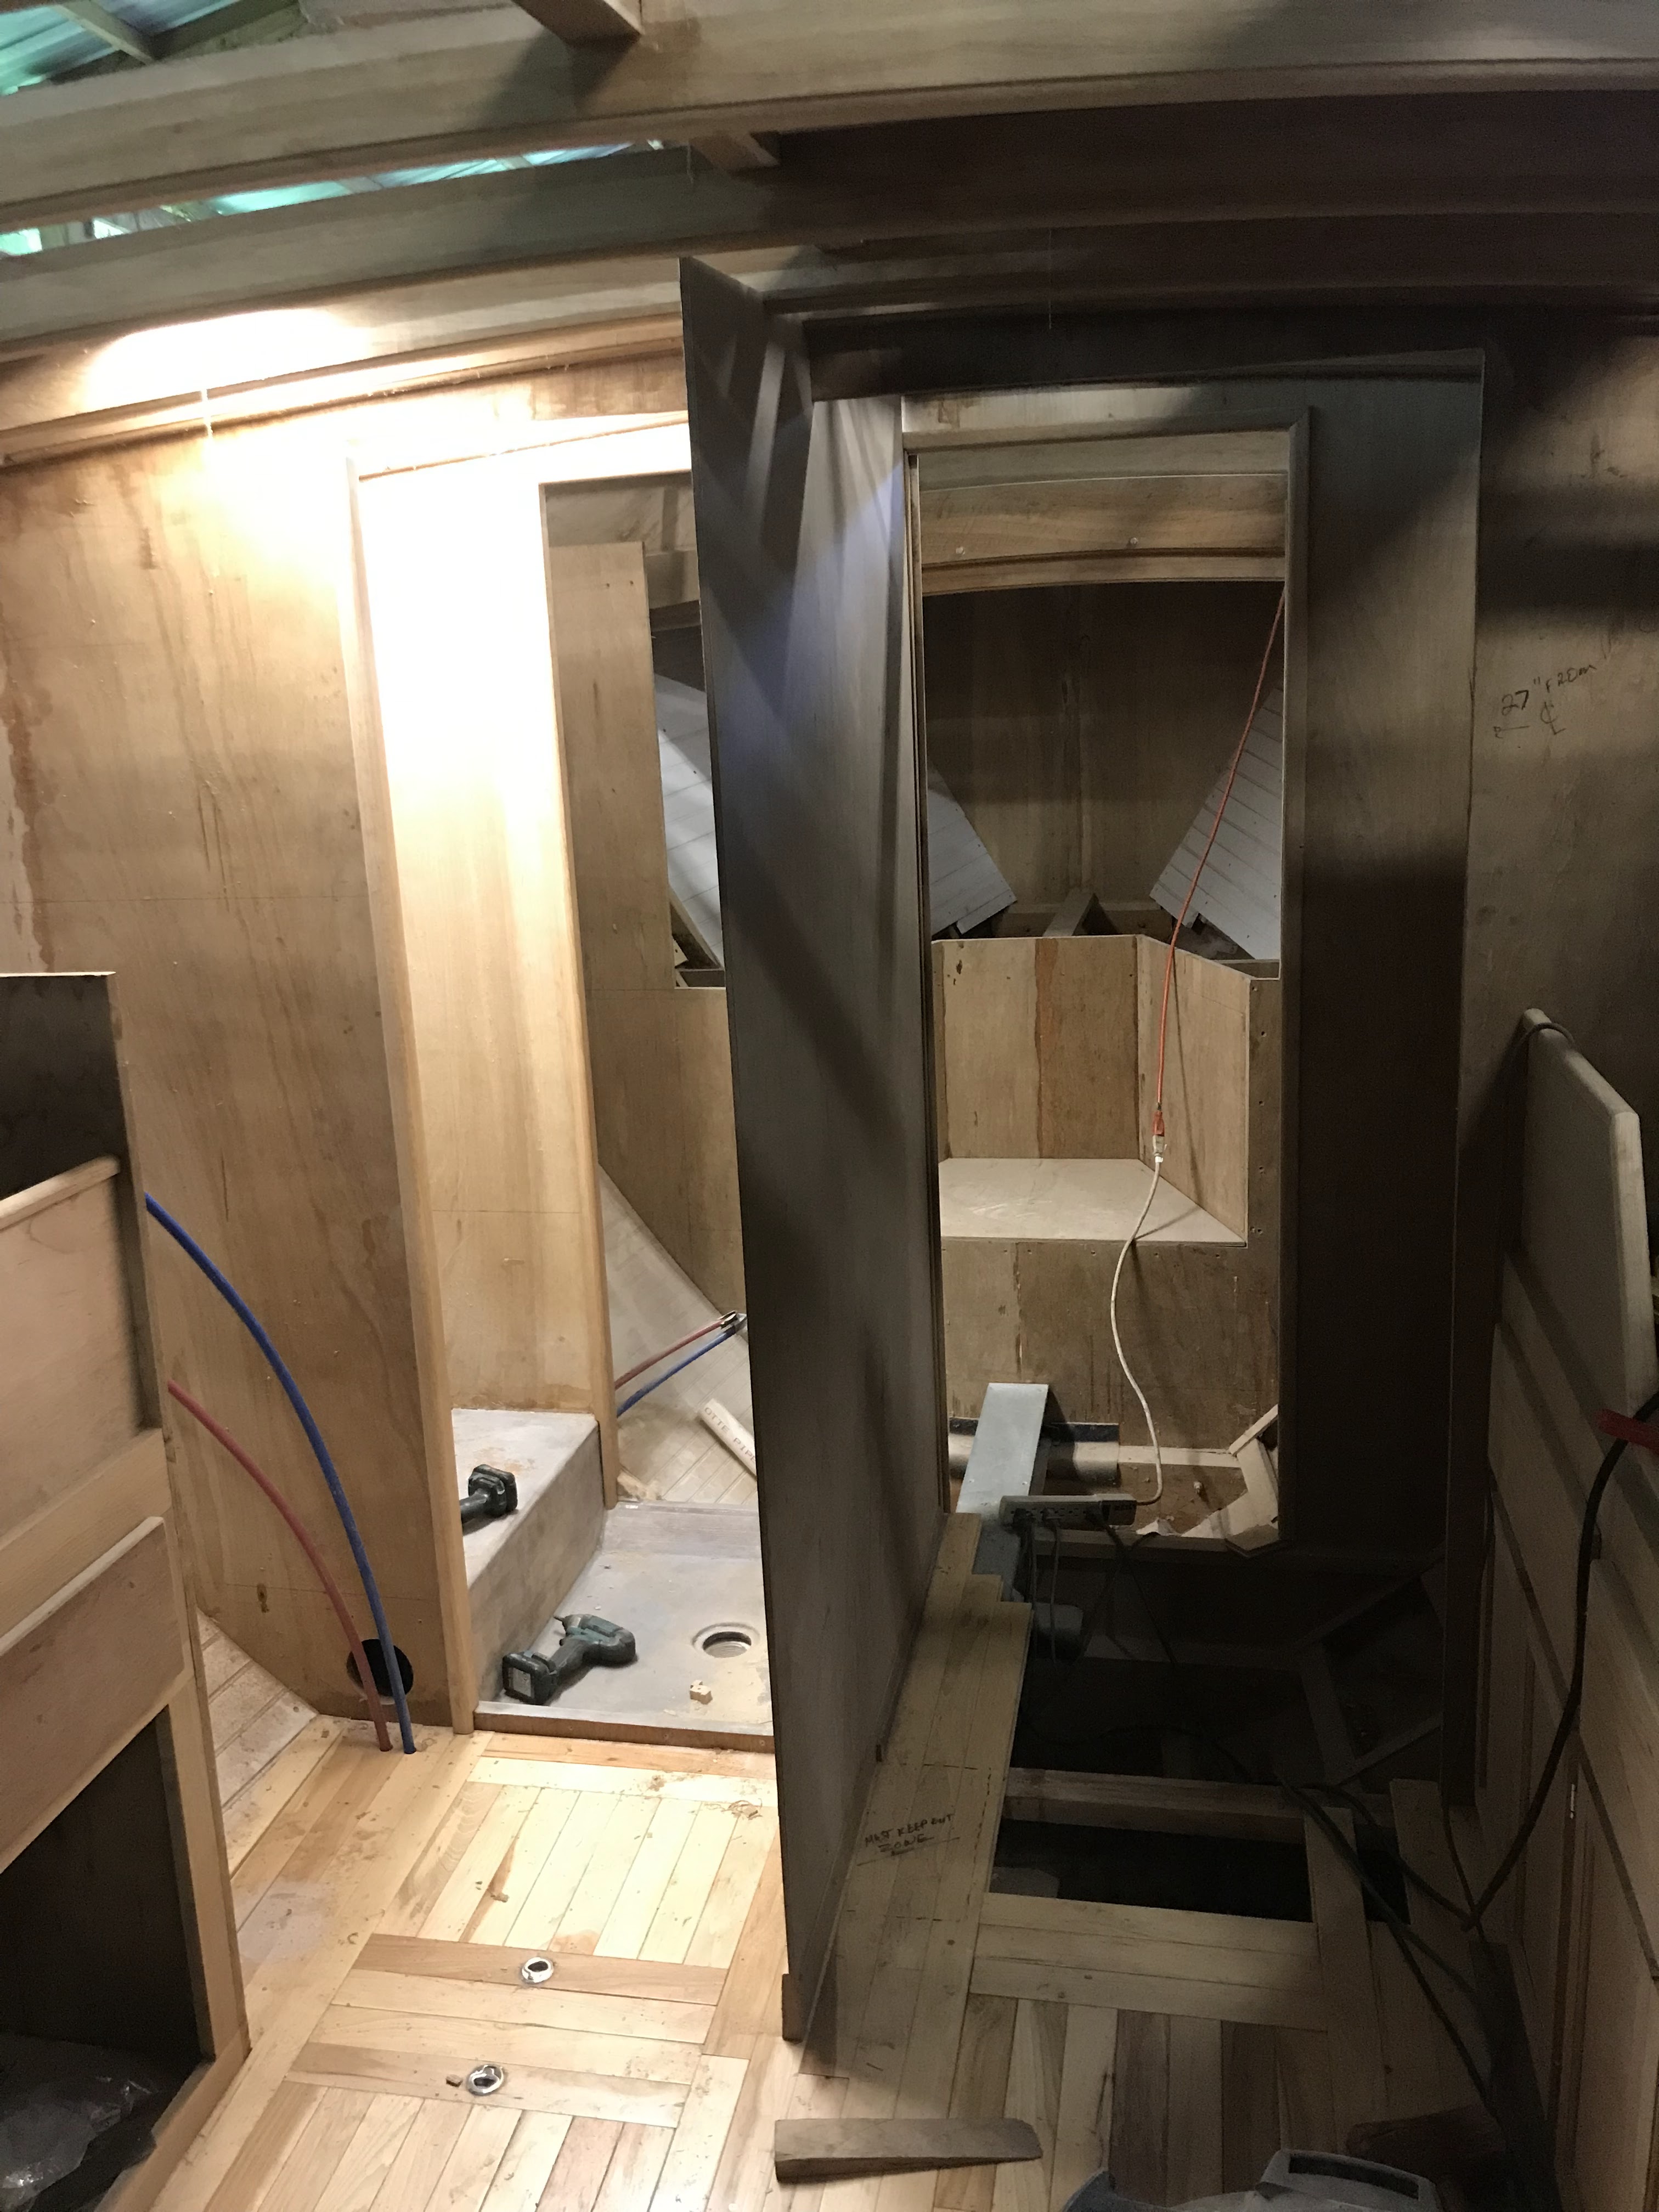
Progress continues on the sole. I've now have everything installed that can be installed. I will need to complete the ceiling (wall boards) before installing the last few sole joists in the forward Vee berth. I also completed the installation of the through hulls for the both heads. The details are in the pictures below. There are a few subtle issues with through hulls that I would like to discuss. The obvious issue is that if they are below the water line then their integrity is critical. Failure could lead to the loss of the vessel. Most inadvertent sinking occur due to failure of the below the waterline plumbing either due to a broken hose, sea cock or siphoning of water because of a lack of a vented loop above the water line. Those issues aside this fixture runs through the hull and potentially exposes the core material (wood in this case) to sea water. 

The first thing I did was to make sure that there was a good surface to mount the flanged sea cock. I laid down a patch of fiberglass and added several layers of epoxy (after initial curing) to fill the weave and obtain some margin above the weave so I could sand the area smooth.

Prepared area for sea cock/through hull installation. 

I described the drilling of the holes earlier. I used silicon bronze carriage bolts to attached the flange to the hull. On the outside of the hull, the holes for the carriage bolts were tapered to accept the square locking part of the carriage bolt.
Typical carriage bolt with square lock under head.

When I tighten the nuts, the square part digs into the tapered part of the hole and into the wood below. If I had not tapered the outside of the hole, I would risk creating a fracture in the fiberglass outer shell. 

Before any bolts are installed, the holes are drenched in thin epoxy to create a water barrier and help with a chemical bond of the thickened epoxy that will accompany the installation of the bolts prior to the curing of the thin epoxy. From earlier discussion, you will remember that thickened epoxy will not bond as well to wood as thinned epoxy and once epoxy is cured, additional coats of epoxy will only make a mechanical, not chemical, bond to the subsequent layer. The trick is to use thin epoxy that will be soaked up by the wood and let it partially cure. While it is still tacky, apply the thickened epoxy. 

Thickened epoxy is applied to the base of the flange, along the head of the bolts and around the head of the through hull that screws up into the flange of the sea cock. Everything is installed and the nuts (with washers and locking washers) are tightened bring the carriage bolts flush with the outside of the hull. The through hull is then screwed into the flange from the outside. Everything is wiped clean.

The outside of the hull showing the carriage bolts and through hull installed. Notice on the inside of the through hull fitting there are two splines. You can buy tools that fit inside and interact with those splines to tighten the fitting but any piece of metal the proper size will work. 

The finished sea cock imbedded in thickened epoxy. 

One thing to keep in mind is that the threads on the through hull are NPS. The NPS stands for National Pipe Straight so there is no taper and no expectation of a water tight seal without some kind of pipe dope. In this case I have used epoxy on multiple fronts to prevent water ingress into the boat and into the wooden core (in my case that would just be the plywood). There is no concern about replacing these down the road. These are solid bronze and made to last. If I need or live to replace them, the bolts can be cut off, nuts cut off, and the through hull drilled out. Usually, these are so imbedded that this is required anyway. 

I also permanently installed the sole that I had previously fit. To start, I marked all of the pieces with a sharpy on masking tape and took a picture so I would not get confuse to where everything went once I dismantled everything. I got confused anyway but since I had pictures I was able to sort it all out. 


All the piece that would be removed are labeled.


The sole is installed. There are three hatches/access panels on the left that do not yet have latches. I only bought a few and I ran out. I wasn't sure how well they would work. It turns out they are perfect. I just hope I can find them again because I'll need about 10 more. 

May 12,

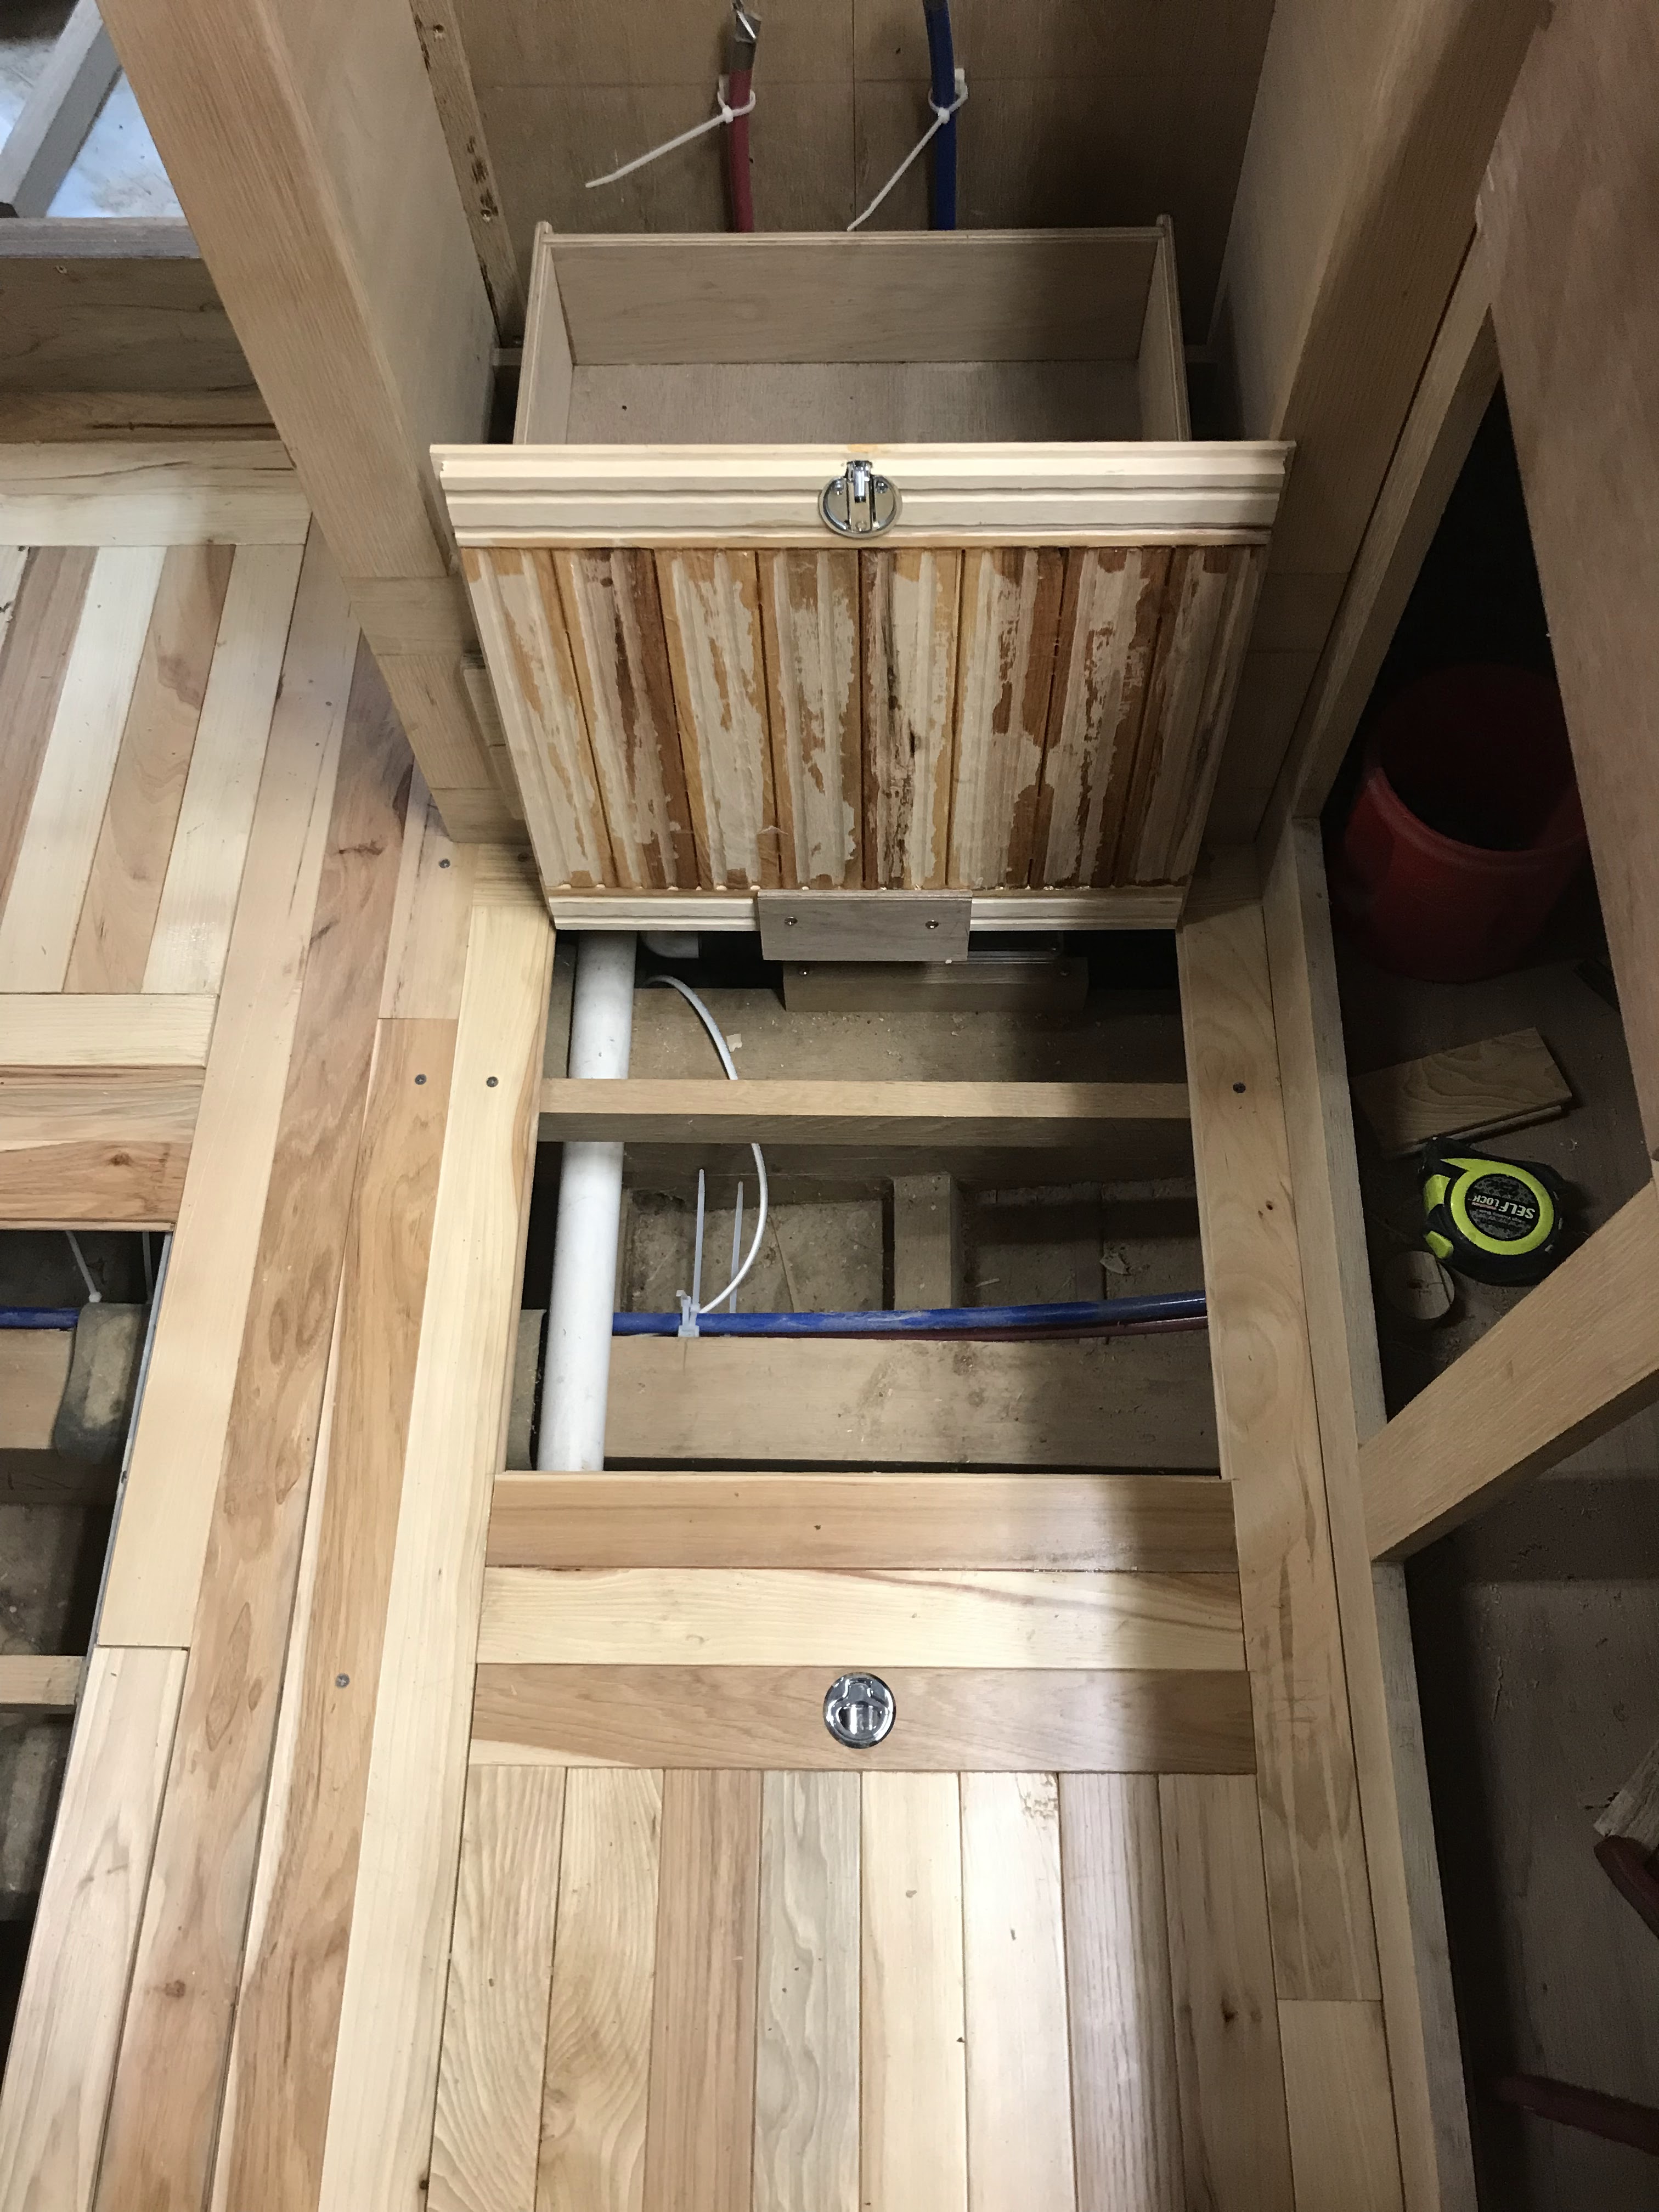
The second shower pan has been installed over the weekend and is ready to clad in fiberglass. 

May 19,

Fiberglass is all wetted out. I waited about 4 hours and came back and trimmed all the edges. The epoxy was stiff but still rubbery and it was very easy to take a sharp knife and trim all the edges. I also took the drain apart so it would not be epoxied together. I noticed two bubbles at the drain. What I mean by a bubble, is fiberglas that has lifted off the wood with an air space. This is bad and would have to have been sanded away and reworked. By catching it before the epoxy cured I was able to drill a few small holes and take a syringe full of epoxy and force the epoxy between the weave and the wood.  It was very satisfying to see a white area (bubble) slowly disappear as the epoxy filled the space and soaked the fiberglass cloth from underneath. The following day, I cleaned the area with soap and water to get rid of the waxy residue. I will later apply 2-3 more layers of epoxy until the work can be sanded smooth.  
May 27

I've applied two more layers of epoxy on the drain pan sanding between each. I'll likely apply one more layer and sand smooth. 

Friday, April 5, 2024

April 2024


 April 5,

I have not posted in awhile but work continues. I've had other priorities lately but I'm getting back into the swing of things. I have decided to concentrate my effort on getting the middle of the boat finished on the inside. This means I have to figure out how I am going to install the sole. As you can see in the photos below, I have a system. Two things are critical: I wanted the sole to look good but have plenty of access to the bilge. The table saw was set up to remove the tongue on select pieces while the router table was set up to add a groove (for the tongue) where there was a tongue. This way, I can turn the tongue and groove flooring around at will making a square hatch hole with the tongues all facing in. The hatch had all the grooves facing out and the bottom of the groove removed so the hatch fits neatly in the hole supported by the tongues. I really need a diagram for that. 

Four access hatches to the bilge with one hatch in place. I can access the keel bolts and all the plumbing. 

All four hatches temporarily in place to check fit. I'll remove them and glue them into one piece on a jig to keep them square. I'll use West System epoxy as usual.  

I have been thinking a lot about the sliding door that acts as an entrance point for the cabin above. I looked into marine grade rails and hardware but they were very expensive and did not look very durable so I decided to build my own. My first thought was to build everything out of wood that I already have. The upper rail where the door would hang just seemed too clunky (design not shown). I decided that a metal square tube with a slot cut down one face would be better. I sourced some 6061 T6 aluminum from Metal Supermarkets (metalsupermarkets.com). They had what I needed for less than $70. All I had to do was machine the slots. 


The sliding door is on the far left hanging from a 1.5"x 0.75" aluminum square tube with a 3/4" slot cut down on face. The door and wall are 1/4" and 3/8" panels respectively. The rail and styles are similar to the cabinets with the exception that the ones used on the wall are 1" thick. The door rides on two 3/4"x 1.4" HDPE blocks that are screwed into the top rail of the door. Additional HDPE blocks (light gray) are shown elsewhere to stabilize the door. 


The door is shown on the bottom left from a top view. The rail (1/5"x3/4" aluminum) with two slots cut out is shown above but artificially rotated and displaced upwards to show the channels. The light gray blocks will ride inside the channel. The area labeled 'opening' is the actual door opening.  


Close up of HDPE slide block. You should also notice that the slot is offset from center in order to minimize the space between the sliding door and wall. 


April 9,

Back to the sole. I have avoided installing the sole because a) I knew it would be a pain in the ass and b) I wanted to have access to everything in the bilge before the sole is installed. I decided that I'd have more access to the bilge by way of access hatches that act as decorative mosaics and just get it done. One of the inspirations was using the router and table saw to make double sided (groove on both sides instead of tongue and groove) boards so that I can have a tongue exposed completely surrounding the hatch that acts as a lip the hatch can sit securely on. The hatch has a groove around their perimeters with the bottom part of the groove cut away so that it sits on the tongues of the hatch opening. 


Three of the hatches are glued together and placed where they are suppose to be. Wooden mallet is on one, drill is on another, and rusty framing square is on the third. The fourth is being glued up. Near the entrance at the upper part of the photo, I have started a new opening for a hatch that will be in front of the shower. That one will have access to the plumbing run and one keel bolt. 


The hatch in front of the shower laid in place. I glued it up yesterday and it is still in its jig. The next access hatch will be for the through-hull seacock for the head and another keel bolt. 


 April, 21.

Continuing working on the sole and miscellaneous projects. The wiring for all the plumbing has been run and paths for all the electrical have been created below the shear clamp.  All wiring will run under the starboard shear clamp, high and dry. 


All four access hatches complete for the port cabin.

This photo shows the simple hinge and latch mechanism.

I made a template from a short piece of flooring to test the latch placement. The aluminum flat bar is for the catch. 

Another photo showing the top side of the latch.

In this case the aluminum catch plate serves to also tie the two boards together although they are also glued.

Also, working on the chain locker. I have rounded all the corners with thickened epoxy and performed some initial sanding. I'll roll on a few more coats of epoxy to thicken everything a bit.

This will be where the through hull (shown upper right) will be installed. I glasses a small section of the inner hull and will build it up with epoxy. Sanding it smooth will create a stable surface to seat the through hull fitting. All through hulls below the waterline have bolted flanges and seacocks. The glass only has its initial epoxy layer at this point. 

Working out the starboard cabin sole (left looking aft). The farthest access (top of the image) is for a keel bolt and head pluming. The next is for the seacock for the head and another keel bolt. The remaining access hatches are for additional keel bolts and storage. In the foreground, you can see another seacock. This one is for the port head. I am glassing a surface on the inside of the hull for it as well. 


April 28,

A bit of work today fitting the seacocks to the hull. I also worked a bit on the ceiling. That is the tongue and groove wall boards. I have to finish two areas (actually closets) before I complete the sole for the forward part of the boat. This is probably the most complicated part of the sole due to the number of access hatches. The aft part where the settees are and the galley will be much simpler since there will only be a few access panels because tankage takes up so much of that space below the sole. 


I have added a few layers of epoxy to the glass I laid to support the through hull fitting for both water inlets to the heads. After sanding flat, I placed the through hull fitting with base plate where I wanted it and marked the outline with pencil. Next, I made a paper pattern of the base to locate the center and used that pattern to mark where I will drill the 1" hole. The entire seacock and flange is temporarily installed to locate the flange bolt holes which are subsequently drilled. Both the 1" hole and bolt holes will be coated in epoxy in case any water should seep through. The bolts and nuts are silicon bronze and will be sealed with slightly thickened epoxy. The idea is to wet out the holes with un-thickened epoxy and let them cure for a few hours and then use slightly thickened epoxy to seal the bolts and the outside part of the seacock. Replacing them will require the bolts and exterior parts to be ground off and re-drilled. These are serviceable and I don't expect to every replace them but you never know. 


Tuesday, October 17, 2023

October 2023


Oct, 14.

I got the stainless steel hinges for the cabinets in on Friday. Time to hang some cabinets. 

Finally got the hung straight.
One of the items I needed to put the drawers and cabinet doors together was syringes to get the epoxy in the grooves. It worked great.


When closing the drawer, the entire drawer rides up that wedge and then drops, locking the drawer closed. To open, you just lift the drawer and pull.  Easy and no hardware.

No one likes a drawer that tips when you open it. This also acts as a stop, so the drawer will not pull all the way out.

Grove under drawer face allows you to easily open the drawer, again, with no hardware.

Putting the drawers together.

Tuesday, August 15, 2023

August 2023

 August 13,

I've spent quite a bit of time preparing the chain locker for glassing. I'm using the same material that I used for the hull; one layer of mat glass underneath a layer of woven. I struggled coming up with a good technique to manage the glassing in this terribly hard place to work. What I ended up doing worked as well as anything I can think of. 

I filled all the screw head holes with thickened epoxy and gave everything a good sanding.

I made paper patterns of all the section of glass (mat and woven) that I would need. 

Carefully cut out all the patterns in the woven and mat glass and rolled each piece carefully to avoid the mat or woven to fray. 

I started with the back of the chain locker so I could still stand in the bottom. A clear departure from earlier work, I rolled on epoxy on the section that I was working on. This made a sticky surface that I was able to stick on the mat glass. The wet epoxy allowed plenty of adjustment once the section of glass was put in place. I lightly rolled the mat with notched application tool (shown below). This eliminated any wrinkles and gatherings and made sure the glass was in the proper place.

The woven glass was hung on top of the mat and held in place with a batten affixed with staples. Another gentle rolling with the application tool to get the woven to lightly adhere to the mat.

Using a chip brush on vertical surfaces and a combination of chip brush and pouring on the other surfaces, I applied the epoxy and spread it across the surface of the glass with the roller application tool. The chip brush is great in corners and areas that were too dry. The roller application tool was great for making sure the mat and woven glass was properly soaked with epoxy.

I used a four inch putty knife to sharpen the corners. The corners will be filleted later for a smooth transition. The purpose of sharpening them is to make sure there are no air gaps.

I'll try to add some pictures later. I was unable to take any during the process. It took 4 hours of constant, messy work. I had no time to take pictures. 

Monday, July 10, 2023

July 2023

 July 10, 2023.


I spent the weekend of the fourth finishing up the floor in our cabin in North Carolina. I worked a bit on the boat last weekend, July 8 but I had to replace the timing belt in my Subaru Forrester. It was time to give the Forrester a little love. I spent a leisurely Sunday replacing everything possible on the front of the engine. New hoses, water pump, new timing belt, tensioner, idler sprockets and wheels, etc. The Forrester is such an easy car to work on. It really has been designed that way. 

On the left is the threshold for the starboard shower. Note the cut to match the existing jam and curbs. 

The shower floor is glassed in along with the platform that the head will be mounted too. The shower drain was temporarily reinstalled while the epoxy was wet to form the gasket seat. A piece of wax paper acts as the mold release. Note the excess glass around the perimeter. 

A waited about an hour and a half for the epoxy to set up. It was still plastic but tough. I used a sharp knife to trim all the excess glass around the perimeter except at the front opening. I only lightly trimmed there since the glass wanted to pull up. Once cured, the opening will will be trimmed and sanded. I have also applied a second coat of epoxy so that I'll have a chemical bond to the first. Once cured, I'll remove the drain, clean with soap and water and lightly sand before adding an additional coat or two.